
1. Introduction
1.1 About This Guide
This guide walks you through installing the Call Anchor mobile app, signing in for the first time, granting the permissions the app needs, and using its core features day to day. It's written for end users and field agents who make and receive business calls using the app.
1.2 What Is the Call Anchor Mobile App?
The Call Anchor mobile app captures calls directly from your phone, prompts you to record the outcome as soon as a call ends, and keeps everything in sync with the Call Anchor web portal and your organization's CRM. Once signed in with your assigned number, every business call you make or receive is logged automatically — no manual entry required.
1.3 Requirements
- An Android device with an active SIM and mobile network or Wi-Fi connection
- A mobile number that has been assigned an active Call Anchor license by your administrator
- Permission to install apps from Google Play
Note: Call Anchor is currently available for Android. If you use a different platform, check with your administrator for supported alternatives.
2. Installing the App
- Open the Google Play Store on your Android device.
- Search for “Call Anchor” and select the official app (Smart Telecalling App).
- Tap Install and wait for the download to complete. Open the app once installation finishes. You'll briefly see the Call Anchor splash and loading
- screens while the app initializes.


3. Signing In
3.1 Enter Your Mobile Number
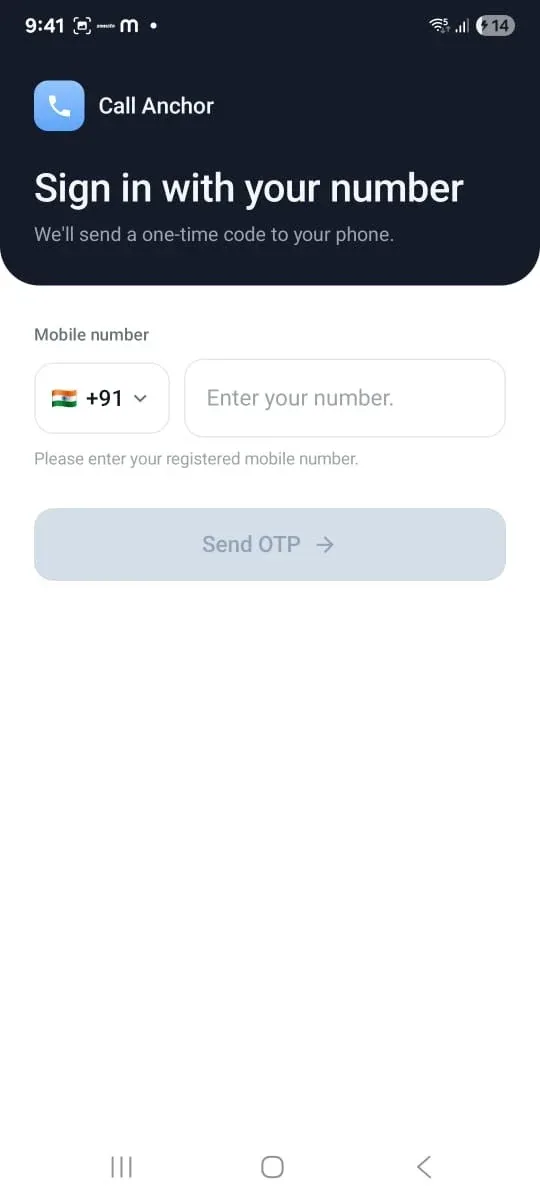
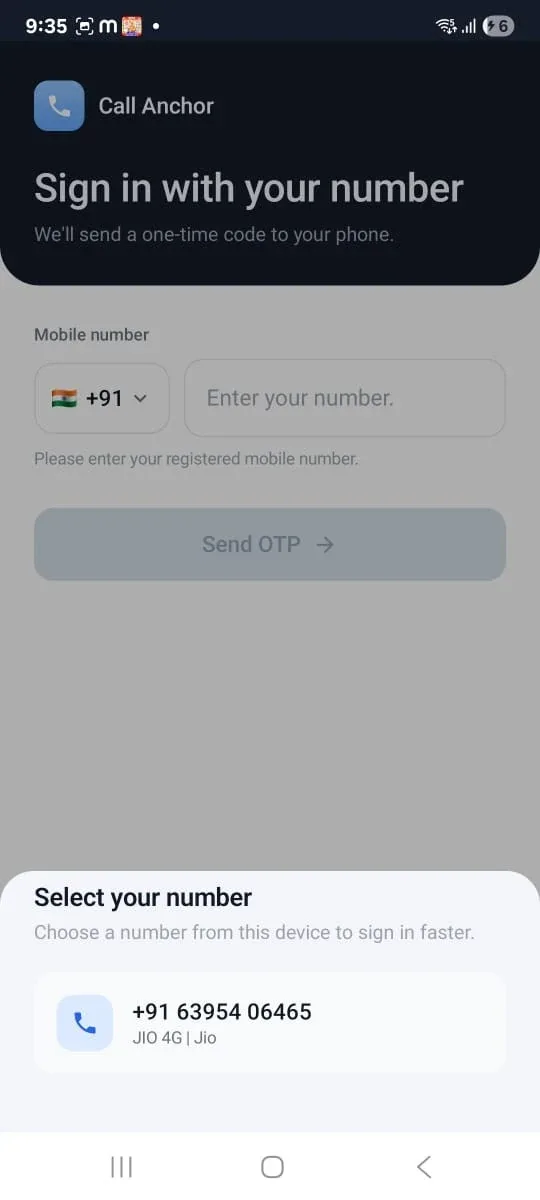
On the sign-in screen, enter the mobile number your administrator assigned a Call Anchor license to. If Call Anchor detects a matching SIM on your device, it will offer to auto-fill your number under Select Your Number for a faster sign-in.
3.2 Verifying With OTP
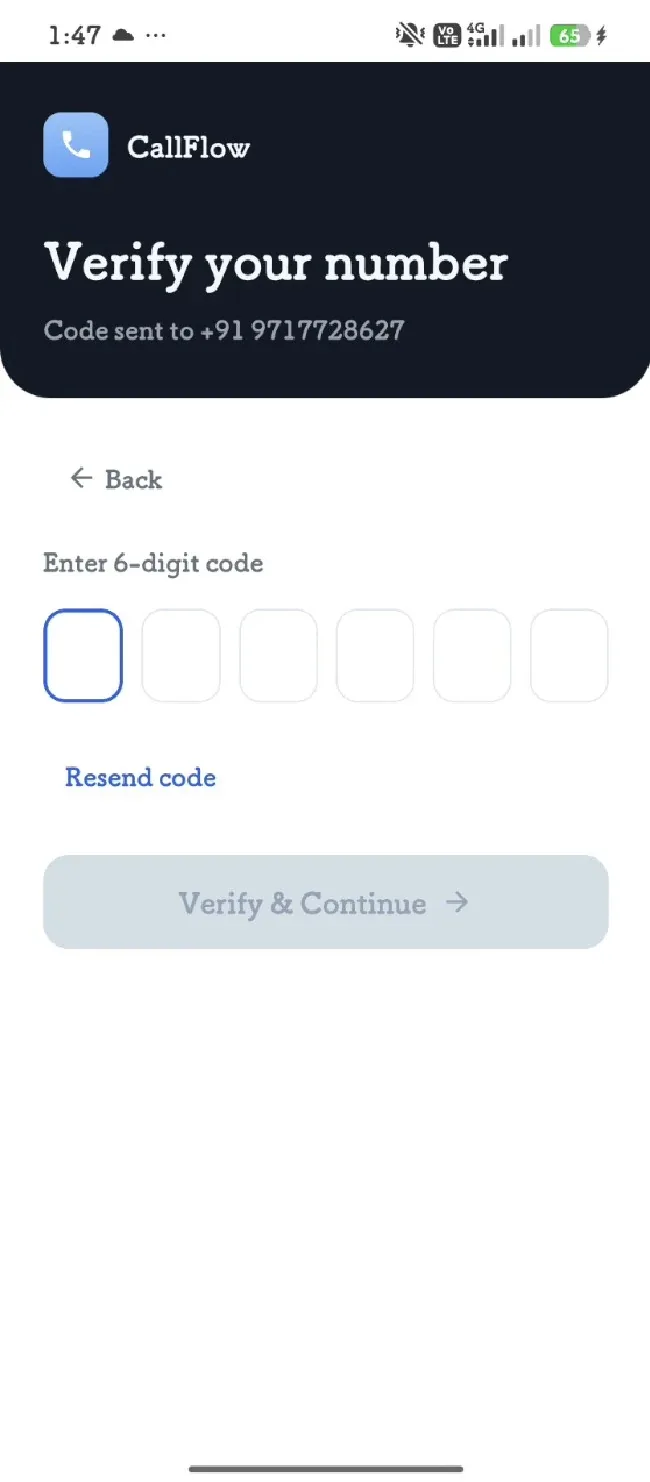
- Tap Send OTP after entering your number.
- Enter the 6-digit code sent by SMS.
- Tap Verify & Continue.
- If the code doesn't arrive within a minute, tap Resend Code.
3.3 Sign-In Errors & How to Fix Them
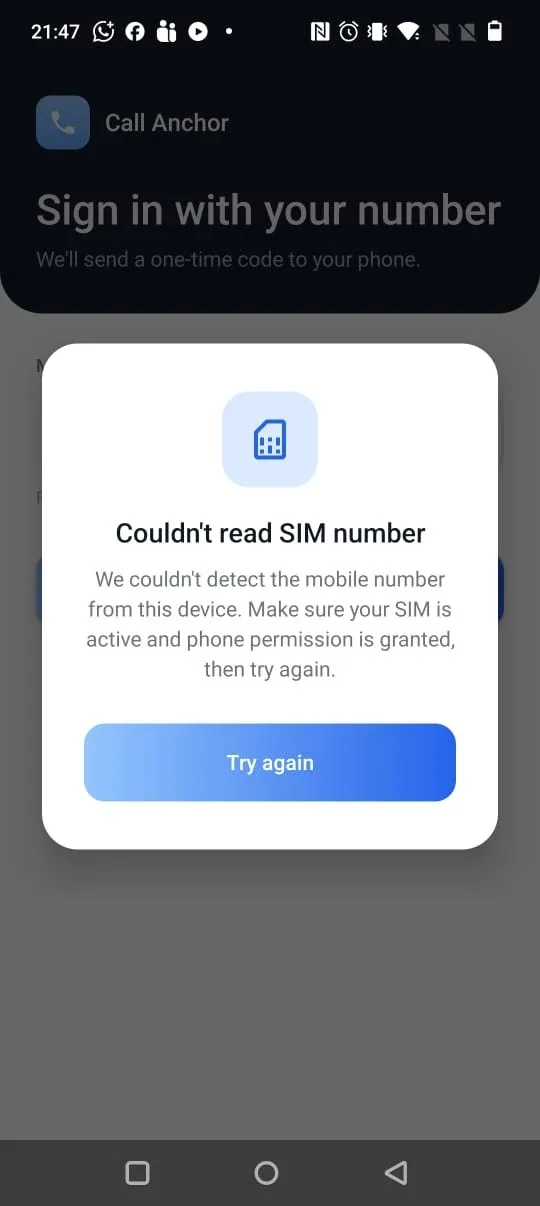
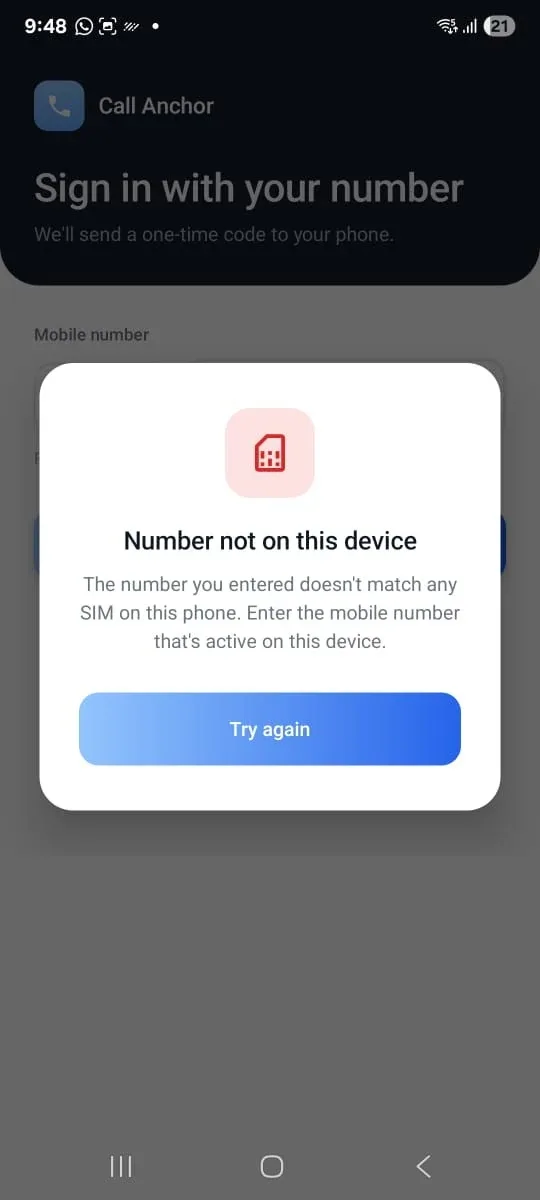
If Call Anchor can't automatically read your SIM, or the number entered doesn't match a SIM on the device, you'll see one of the following prompts. Tap Try Again after checking your SIM and phone permissions, or re-enter the correct number.
4. Granting App Permissions
Call Anchor needs a set of device permissions to detect, record, and enrich your calls, and to keep running reliably in the background. You'll be asked for some permissions before sign-in, and the remaining required and recommended permissions right after you sign in.
4.1 Permissions Requested Before Sign-In
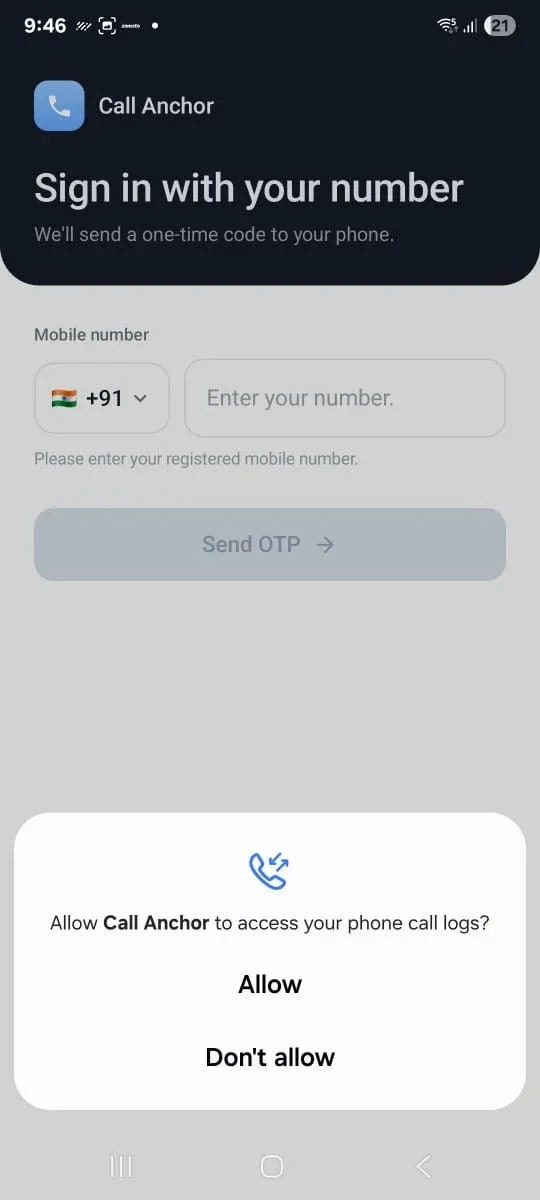
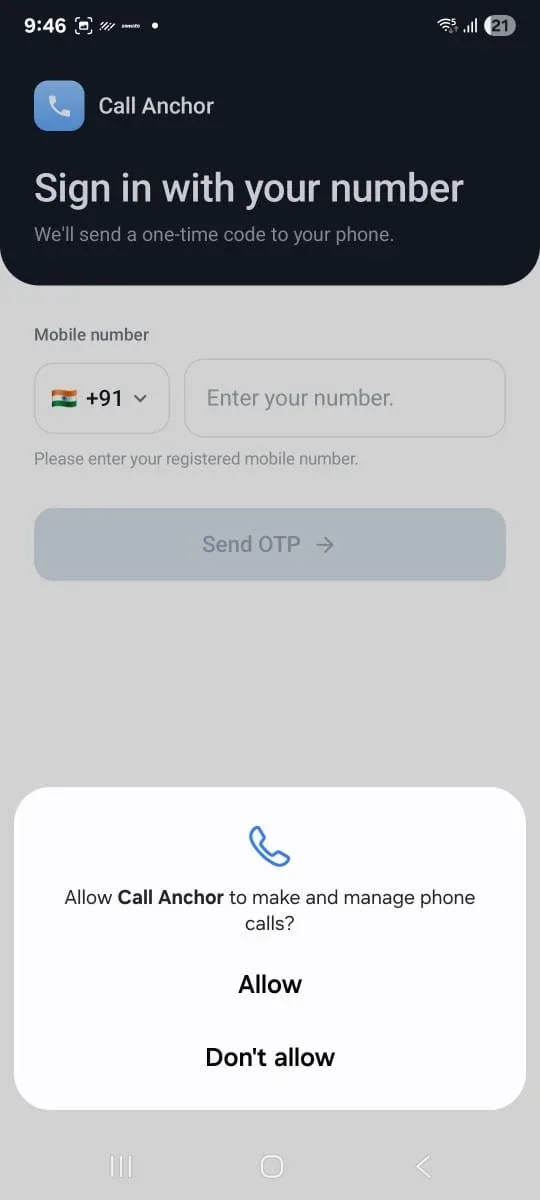
Before you can send an OTP, Call Anchor asks for permission to read your call logs and to make and manage phone calls — these are needed to detect and log calls on your device.
4.2 Permissions Requested After Sign-In
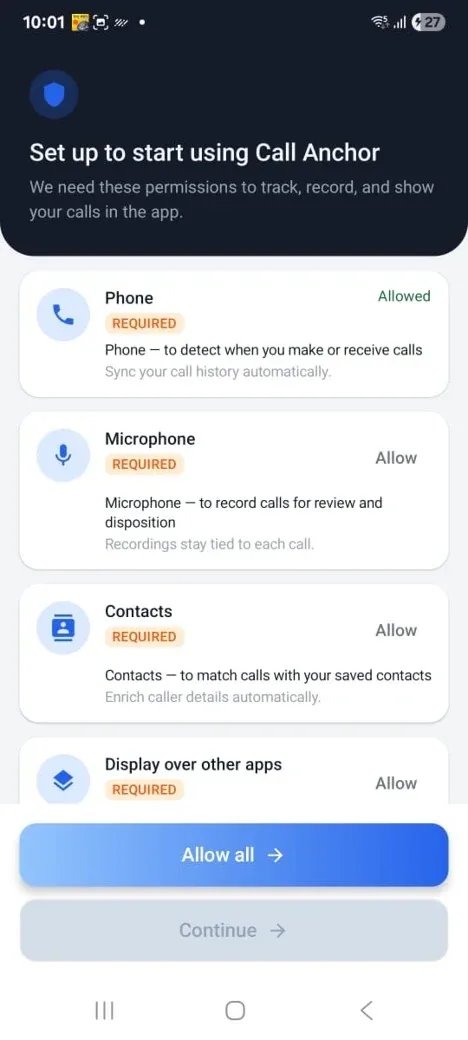
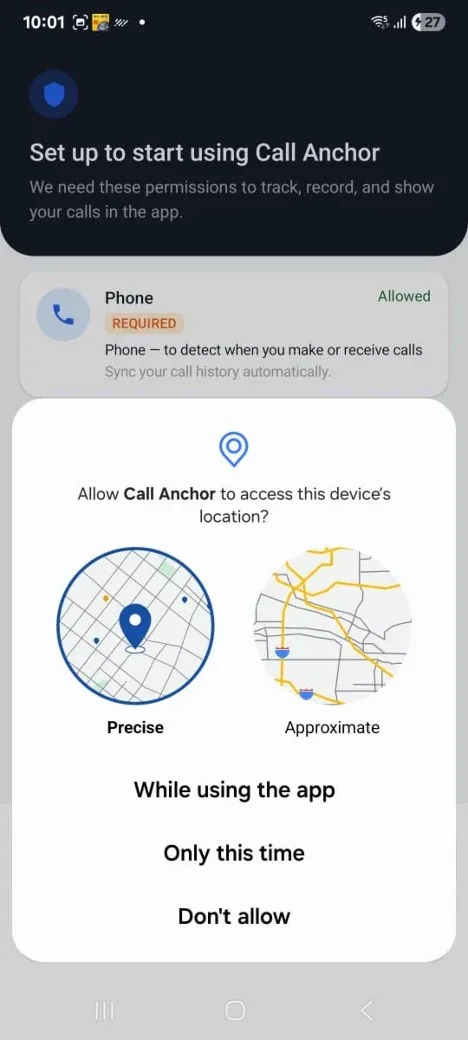
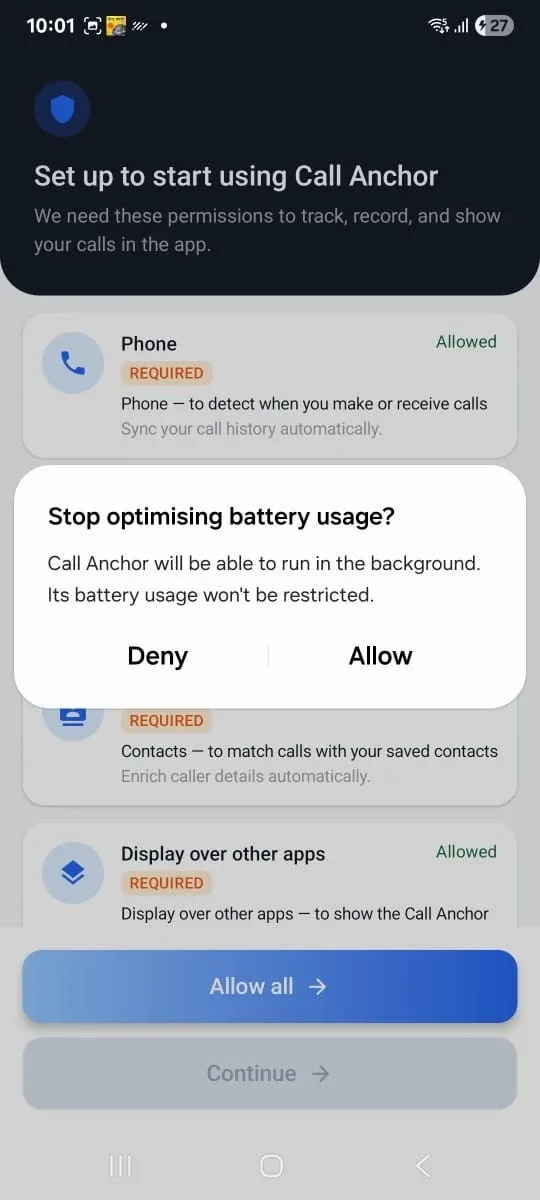
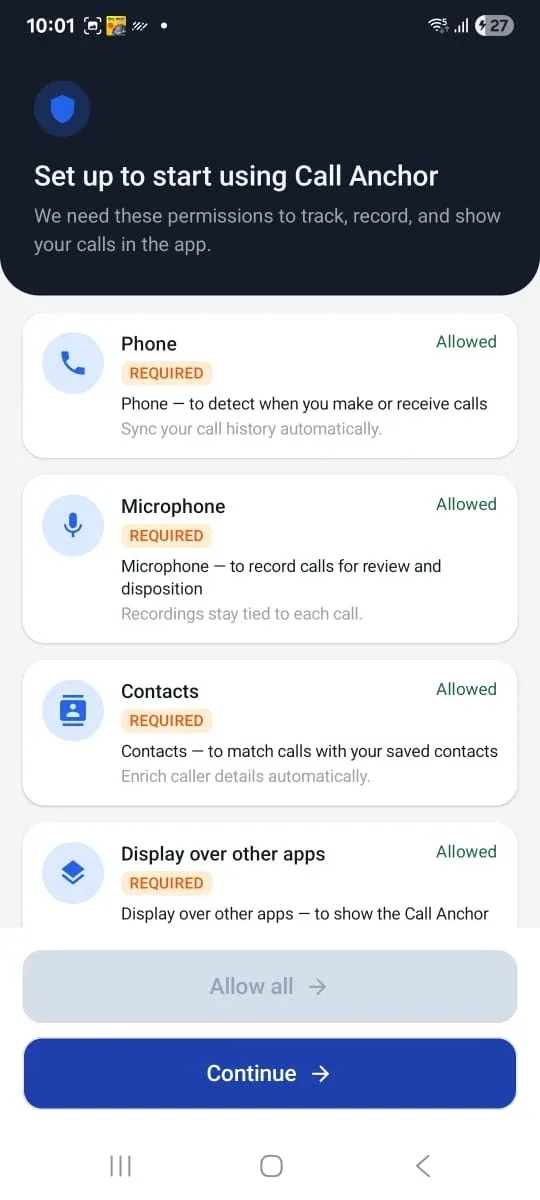
After signing in, the Set Up To Start Using Call Anchor screen lists all required permissions in one place. Tap Allow All to grant everything at once, or review and allow each one individually, then tap Continue.
| Permission | Required? | Purpose |
|---|---|---|
| Phone | Required | Detect when you make or receive calls and sync call history automatically. |
| Microphone | Required | Record calls for review and disposition. |
| Contacts | Required | Match calls with your saved contacts automatically. |
| Display over other apps | Required | Show the disposition prompt when a call ends. |
| Notifications | Recommended | Receive alerts and disposition reminders. |
| Music & audio | Recommended | Access on-device audio needed for call recording playback. |
| Location | Recommended | Enrich call context where location- based features are used. |
| Background usage (battery optimization) | Recommended | Let Call Anchor keep running in the background so calls aren't missed. |
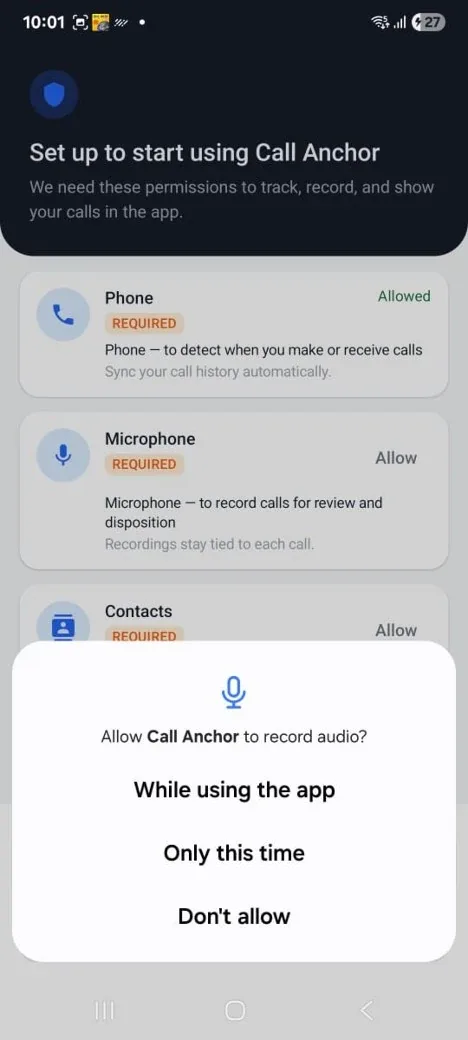
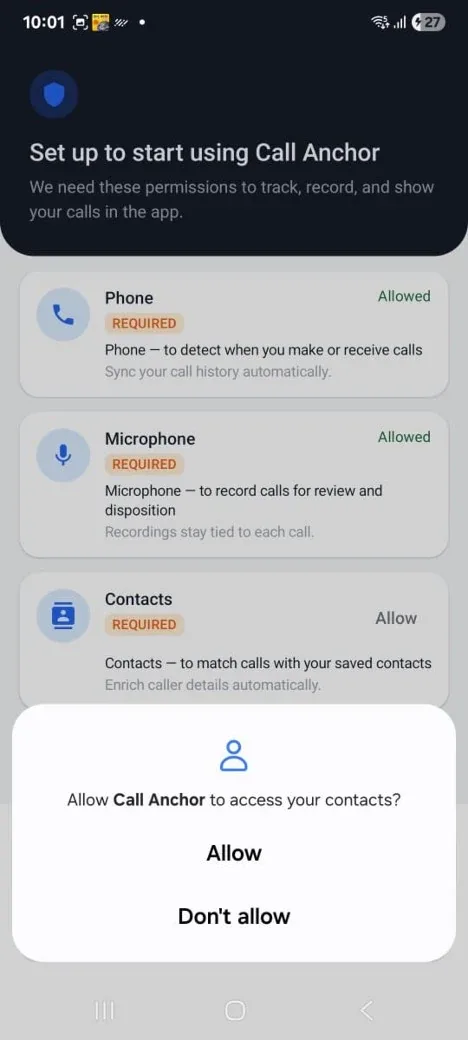
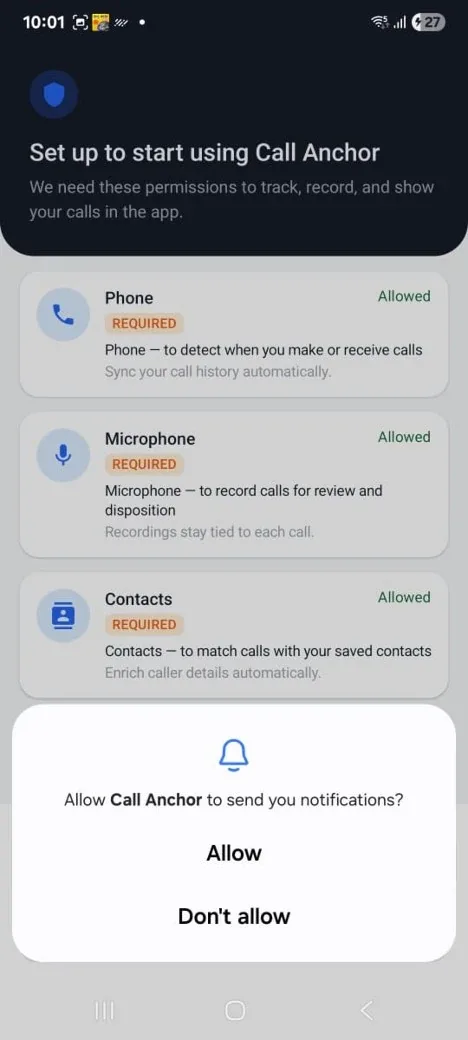
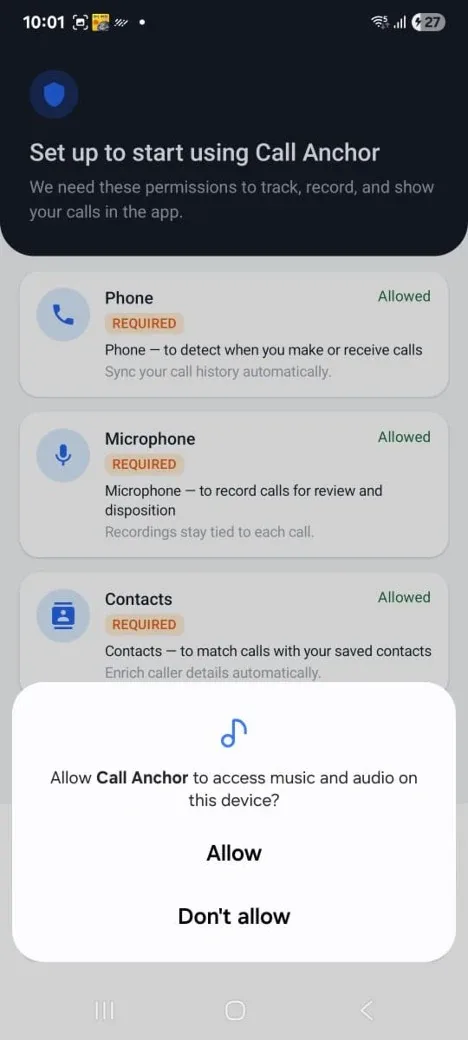
4.3 Why Each Permission Is Needed
Important: If you deny a required permission, related features — such as automatic call detection or the disposition prompt — won't work correctly. You can re-enable any permission at any time from your phone's system Settings → Apps → Call Anchor → Permissions.
5. Home Dashboard Tour
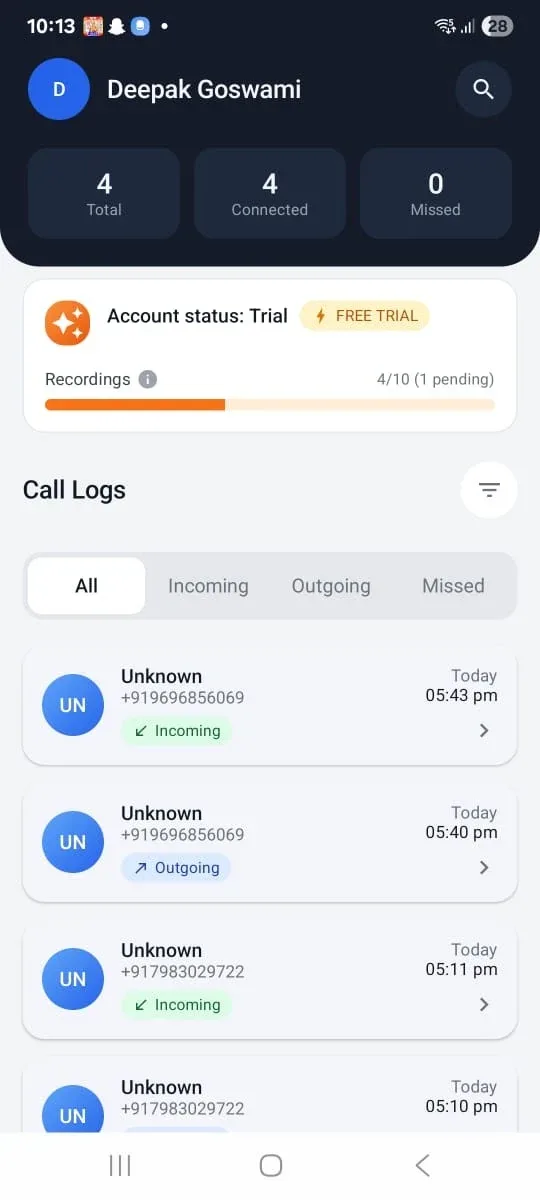
After signing in, the Home screen gives you an at-a-glance view of your calling activity, including:
- Call totals — Total, Connected, and Missed calls
- Your account/trial status and recording usage
- A search bar to quickly find a contact or number
- Your full Call Logs list, filterable by All, Incoming, Outgoing, or Missed
6. Searching & Filtering Call Logs
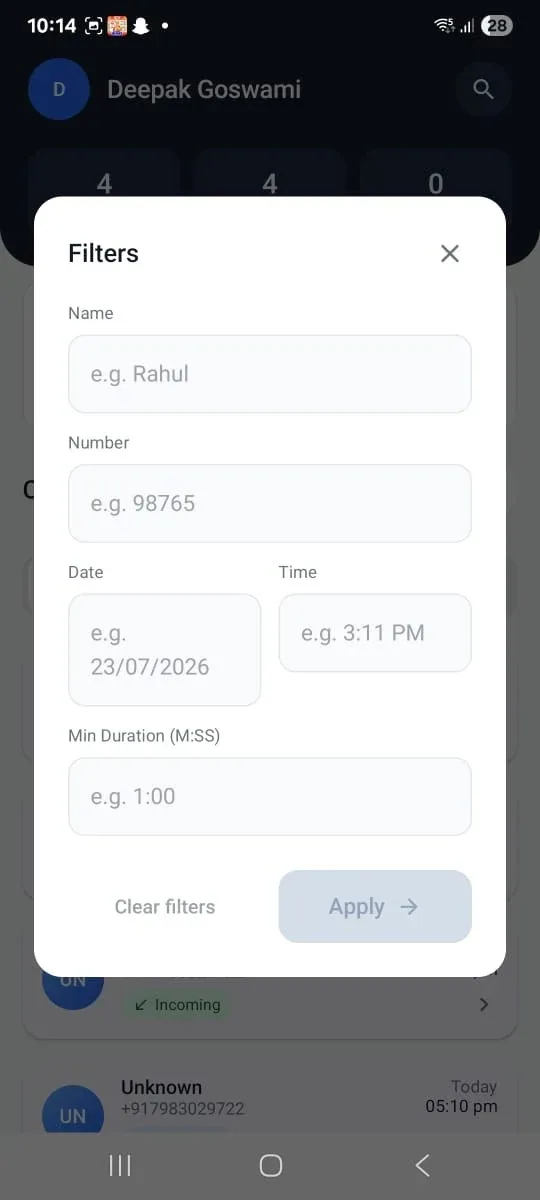
Tap the search icon to look up a contact or number, or tap the filter icon to open Filters and narrow the Call Logs list by name, number, date, time, or minimum call duration. Tap Clear Filters to reset, or Apply to view the matching results.
7. Viewing Call Details & Recordings
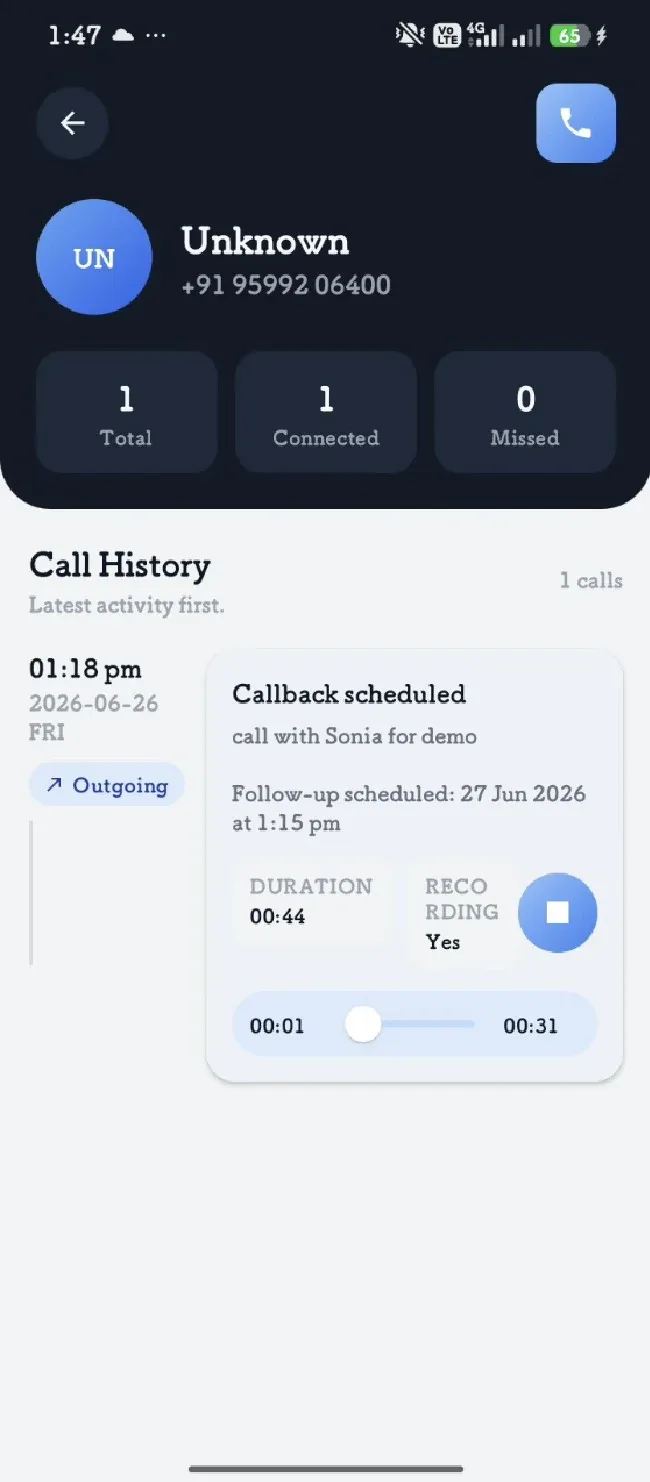
Tap any call in the Call Logs list to open its detail view. This shows every logged interaction with that contact, along with call duration, disposition notes, and a recording playback control — the same information available from the Call Anchor web portal's Call Detail page.
8. Call Disposition & CRM Sync
As soon as a call ends, Call Anchor automatically shows a disposition pop-up on top of your phone's dialer screen. This is where you capture the outcome of the call before moving on — and it's what triggers the record to sync to your CRM.
- End the call as you normally would from your phone.
- The disposition pop-up appears automatically, pre-filled with the call's number and duration.
- Select the Call Type — Personal or Business. This determines whether the recording is synced.
- Select an Outcome — for example Interested, Callback scheduled, or Not interested.
- Add Notes summarizing the conversation (optional but recommended).
- If a follow-up is needed, set the Schedule Follow-up date and time.
- Tap Save Interaction. The call, its disposition, and recording (for Business calls) are synced to your connected CRM automatically.
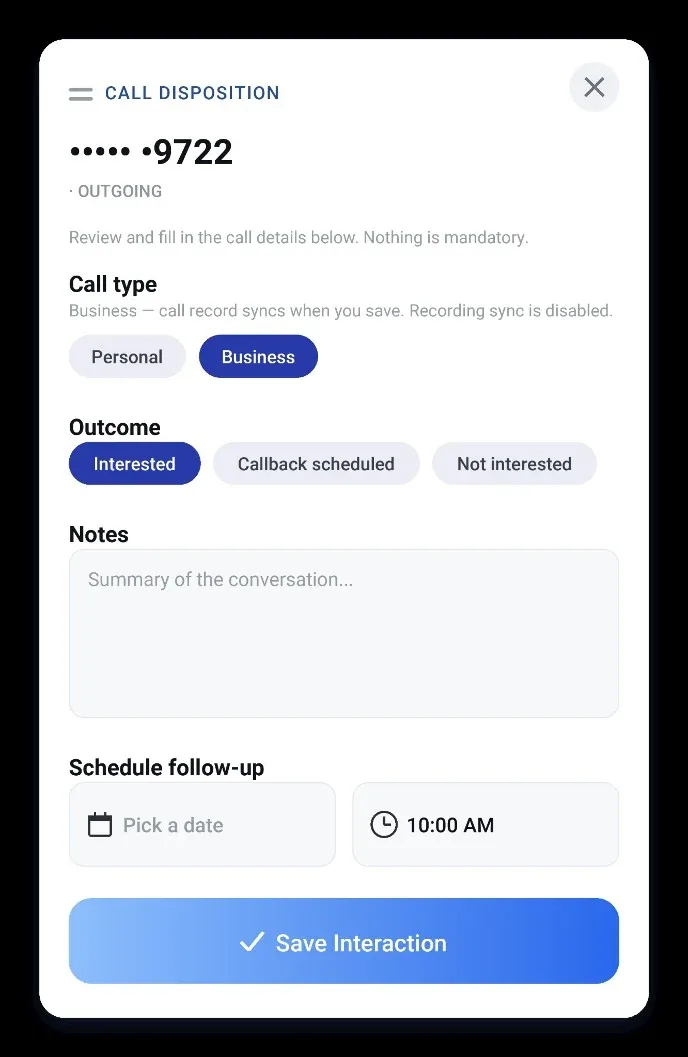
Important: The Call Type you select determines what gets synced. Business calls sync their recording to the server when you save; Personal calls are logged but their recordings are not uploaded. Choose the correct type before saving.
9. Profile & App Settings
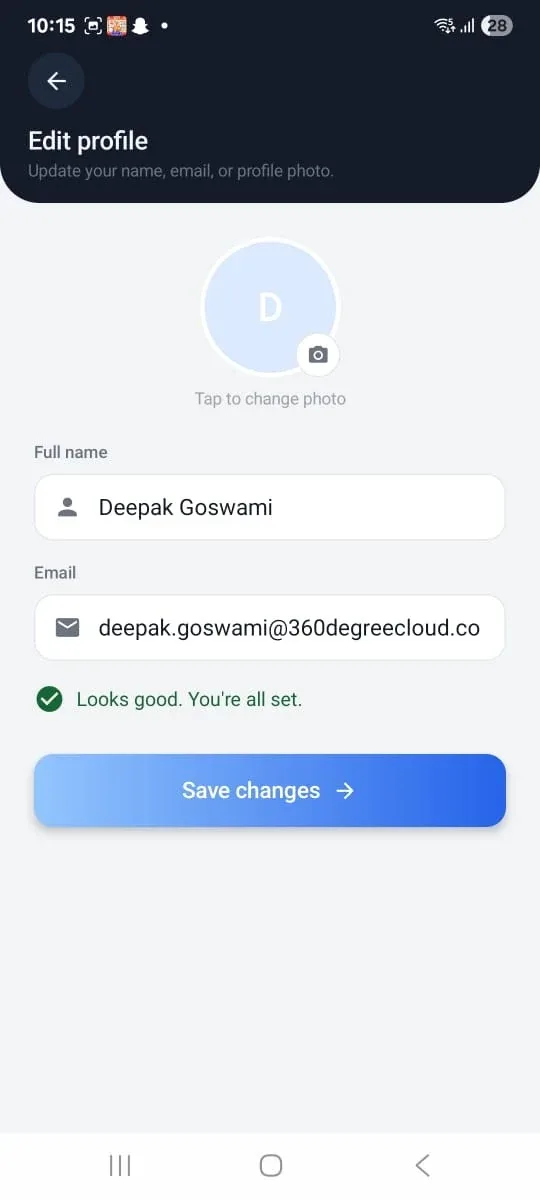
Tap your profile icon on the Home screen to open the account menu, where you can edit your profile, manage notifications, switch appearance mode, or log out.

10. Logging Out
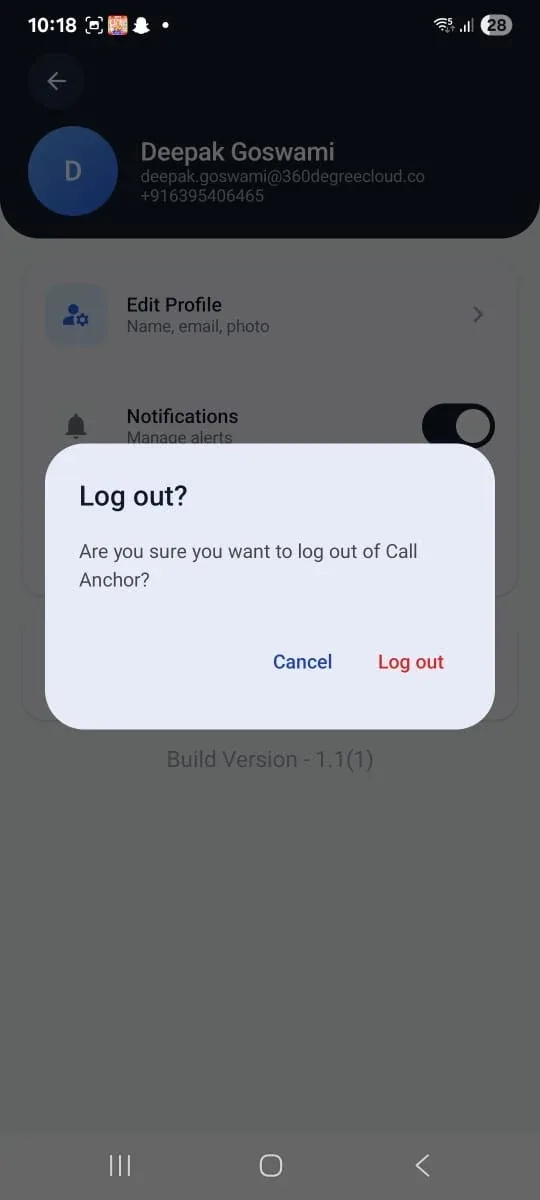
To sign out of the app, open the account menu and tap Log Out, then confirm on the prompt that appears.
11. Troubleshooting & FAQs
| Issue | Likely Cause | Resolution |
|---|---|---|
| “Couldn't read SIM number” | SIM not active, or phone permission not granted | Confirm your SIM is active and Phone permission is allowed, then tap Try Again. |
| “Number not on this device” | The entered number doesn't match any SIM on the device | Enter the mobile number that's actually active on this device. |
| Didn't receive OTP code | Delivery delay or incorrect number entered | Tap Resend Code, then verify the number on file is correct. |
| Calls not being detected/logged | Required permissions (Phone, Microphone, Contacts, Display over other apps) not granted | Go to phone Settings → Apps → Call Anchor → Permissions and allow all required permissions. |
| App stops running in the background | Battery optimization is restricting the app | Allow Call Anchor to run in the background when prompted, or disable battery optimization for the app in system Settings. |
| Disposition pop-up doesn't appear | “Display over other apps” permission not granted | Grant the Display over other apps permission from system Settings. |
| Recording missing from a call | Call type was set to Personal, or recording is disabled for the account | Confirm the call type was Business, and check recording settings with your administrator. |
| Trial usage banner appears / recordings capped | Free trial recording limit reached | Ask your administrator to review Licenses in the web portal or upgrade to a paid plan. |
12. Getting Further Help
If an issue isn't covered above, tap through the in-app Tutorial for guided walkthroughs, or contact your Call Anchor administrator or support team for further assistance.