
1. Introduction
1.1 About This Guide
This guide is designed for end users, sales representatives, managers, and administrators who use Call Anchor on a daily basis. It walks through every part of the product — from creating an account and connecting your CRM, to recording, reviewing, and syncing calls from both the web portal and the mobile app.
Tip: New to Call Anchor? Start with Section 2, “Getting Started,” to create your account and complete first-time setup before exploring the rest of this guide.
1.2 What is Call Anchor?
Call Anchor is a call recording, tracking, and CRM-sync platform available as both a web portal and a mobile app. It captures your calls, keeps a searchable record of every conversation, and automatically syncs call activity — recordings, notes, and call metadata — into your connected CRM so your team always has an accurate record of customer interactions. With Call Anchor you can:
- Automatically record and log calls made from the mobile app or connected calling platforms
- Sync call records, recordings, and notes directly into your CRM
- Review call details, transcripts, and recordings from the web portal or the mobile app
- Manage licenses, users, and integrations from a central admin dashboard
2. Getting Started
This section covers everything needed to create a Call Anchor account and complete first-time setup, from sign-up through profile configuration.
2.1 Creating an Account
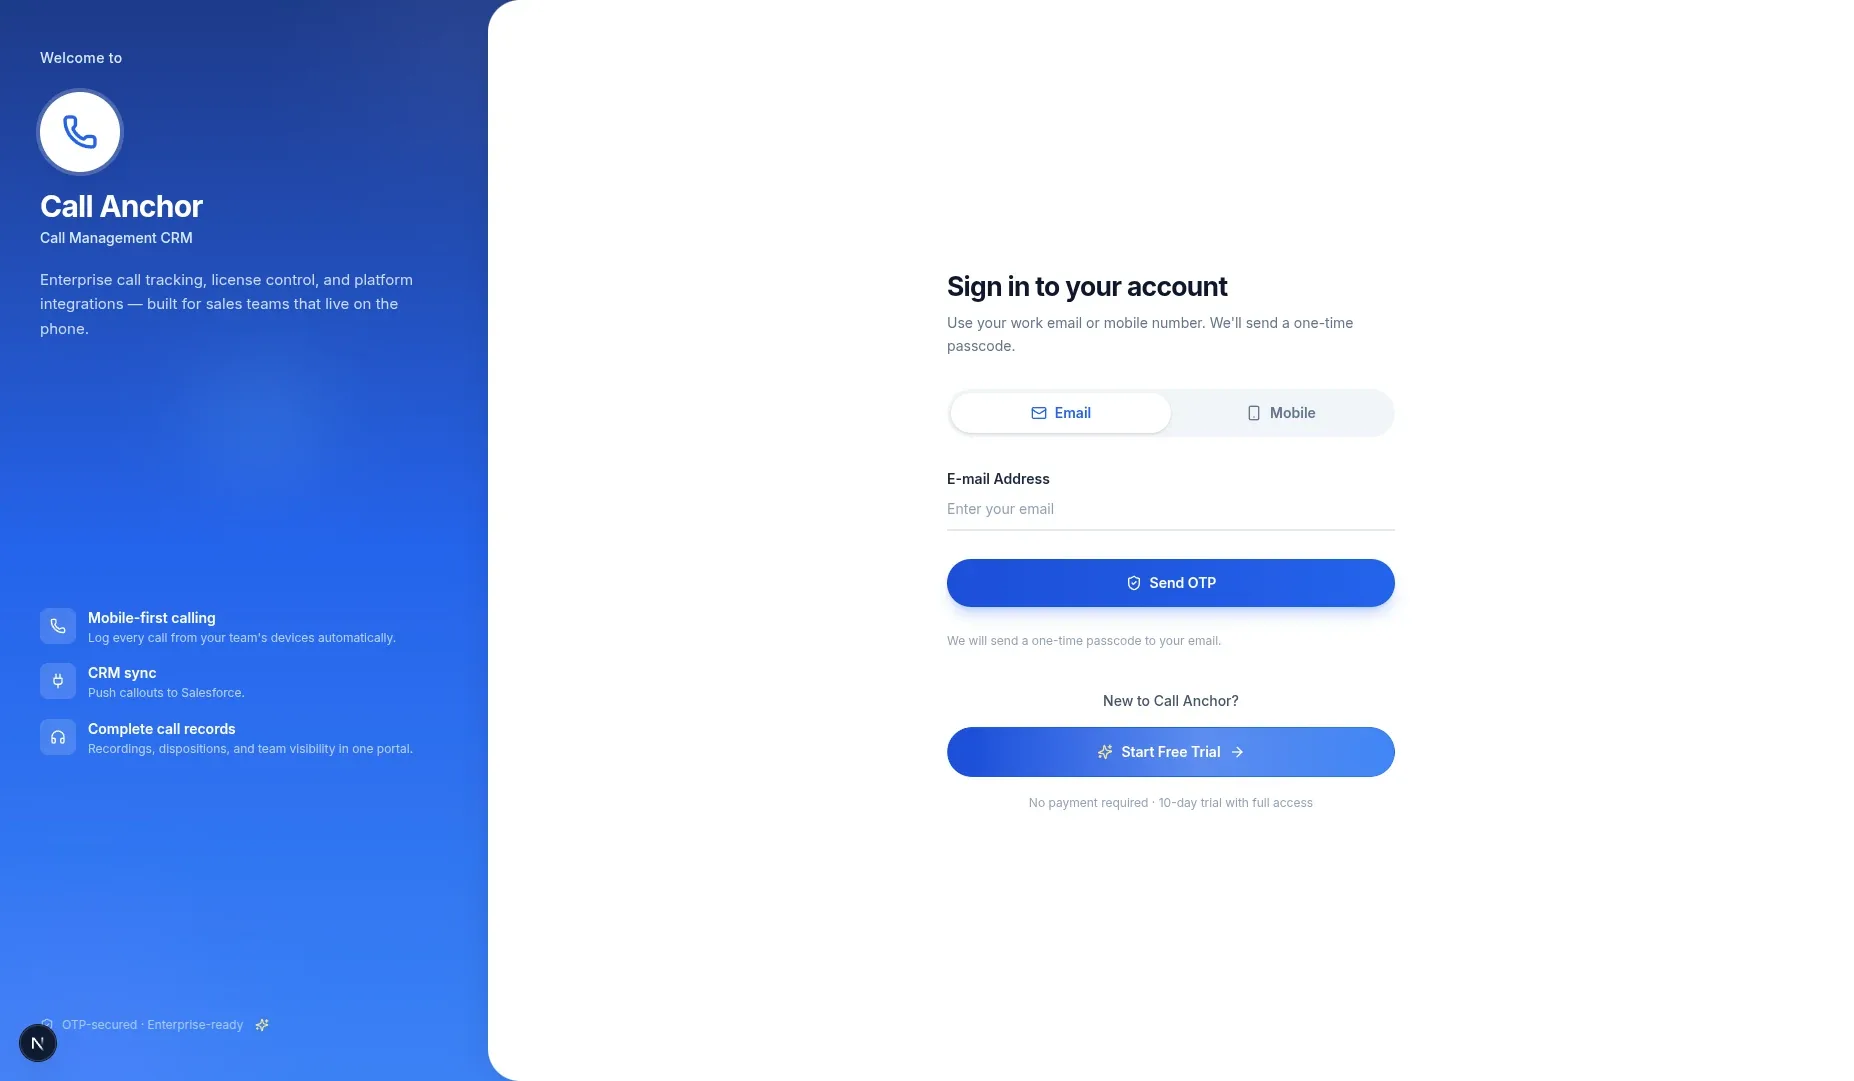
- Go to the Call Anchor sign-up page in your web browser.
- Enter your work email address or mobile number.
- Choose a password, or continue with a one-tap social/SSO option if available.
- Click “Sign Up” to create your account.
2.2 Verifying Your Account (OTP)
After signing up, Call Anchor sends a one-time password (OTP) to confirm your mobile number.
- Call will be sent on a registered number for the 6-digit verification code.
- Enter the code on the Verify OTP screen.
- Click “Verify” to confirm your account.
- If you didn’t receive a code, use the “Resend Code” link.
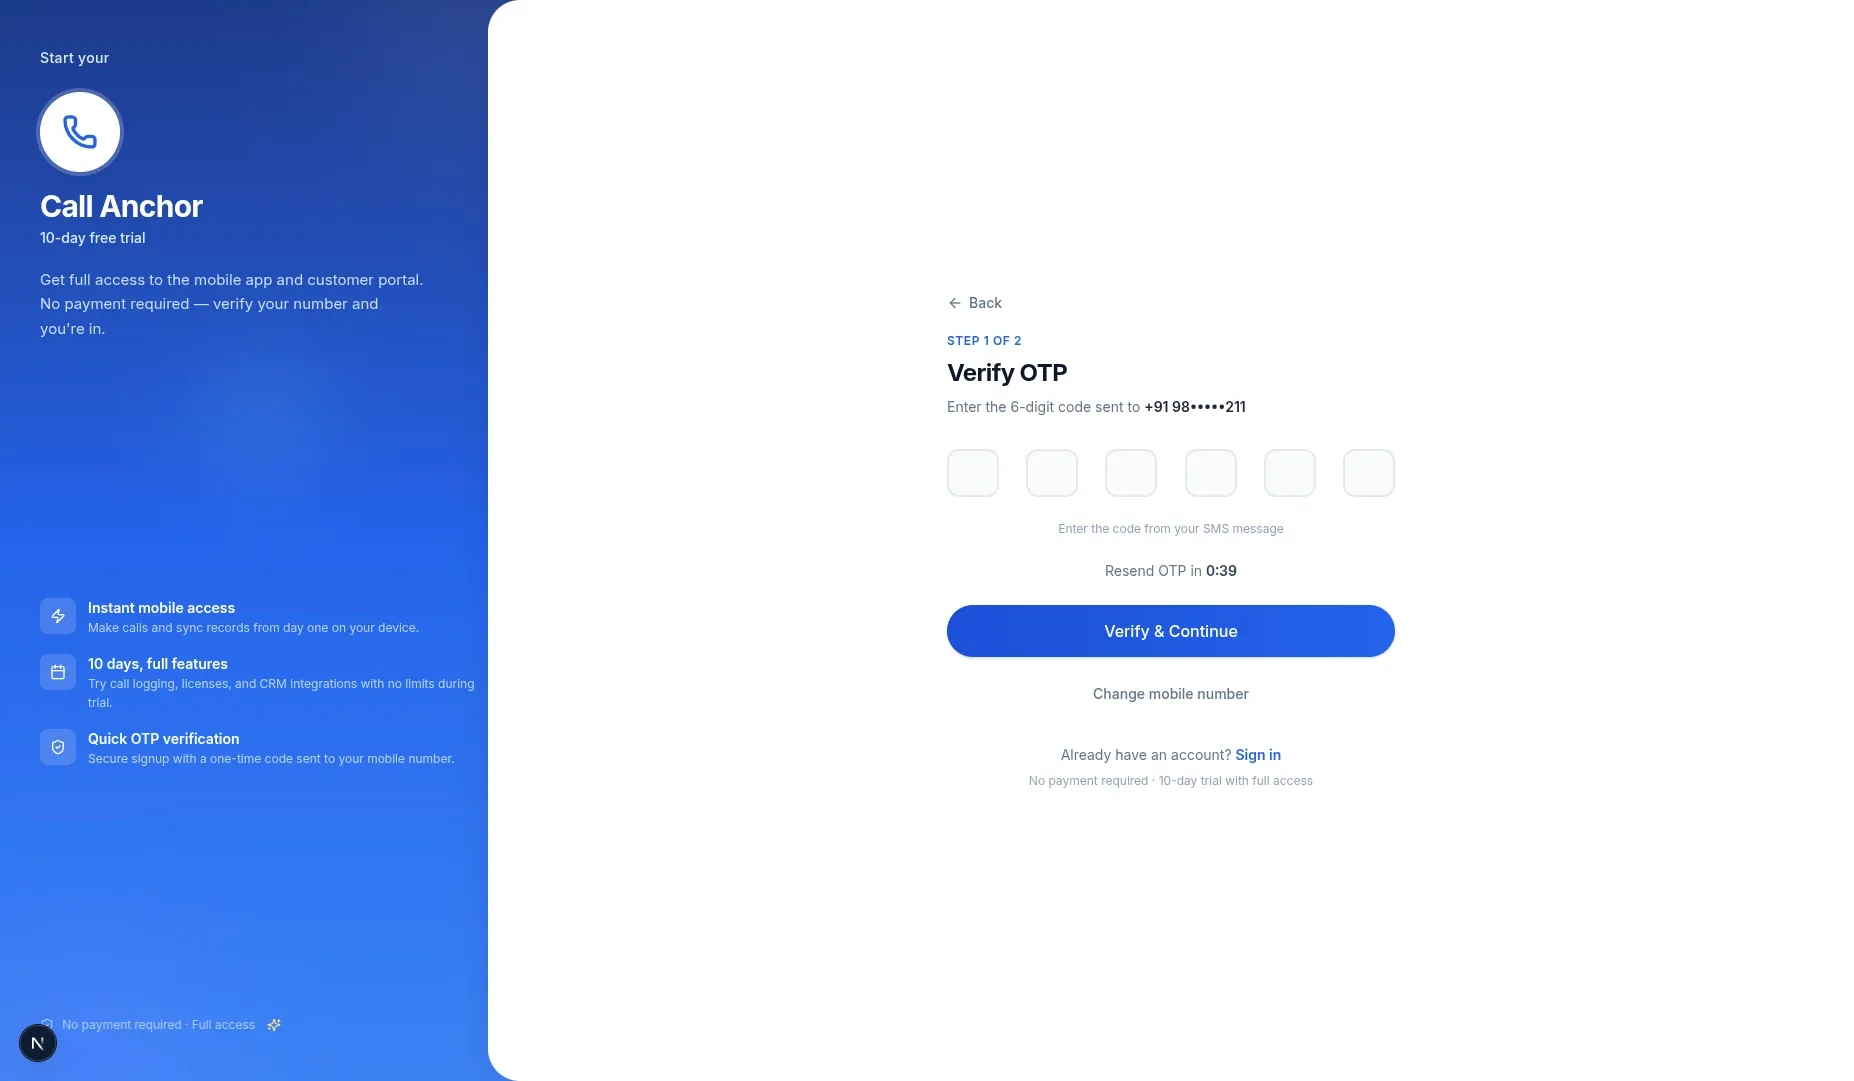
Note: OTP codes are time-limited. If your code expires before you can enter it, request a new one using “Resend Code.”
2.3 Starting Your Free Trial
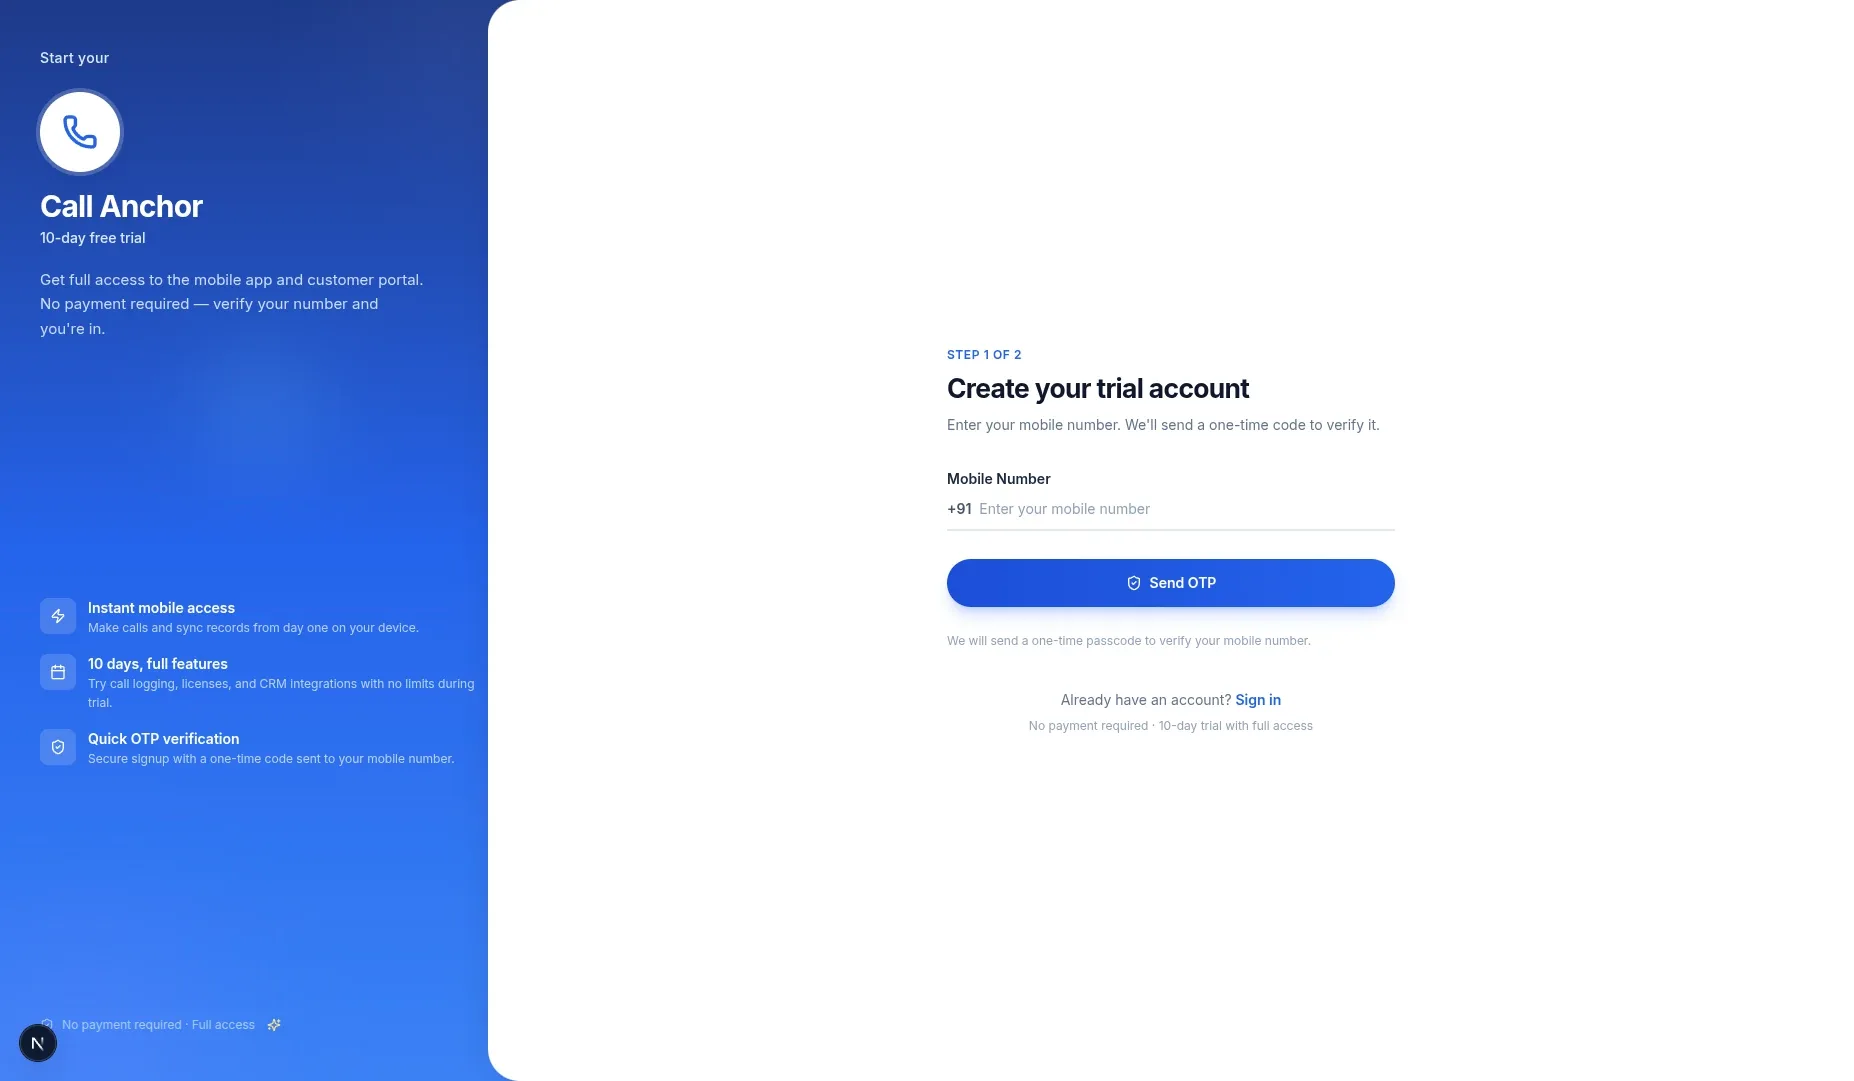
New accounts can start with a free trial to explore Call Anchor’s full feature set before choosing a paid plan.
- From the welcome screen, select “Start Free Trial.”
- Review the trial plan details and included features.
- Confirm your selection to activate the trial on your account.
- Your trial status and remaining days are visible any time from Settings → Licenses.
2.4 Setting Up Your Profile
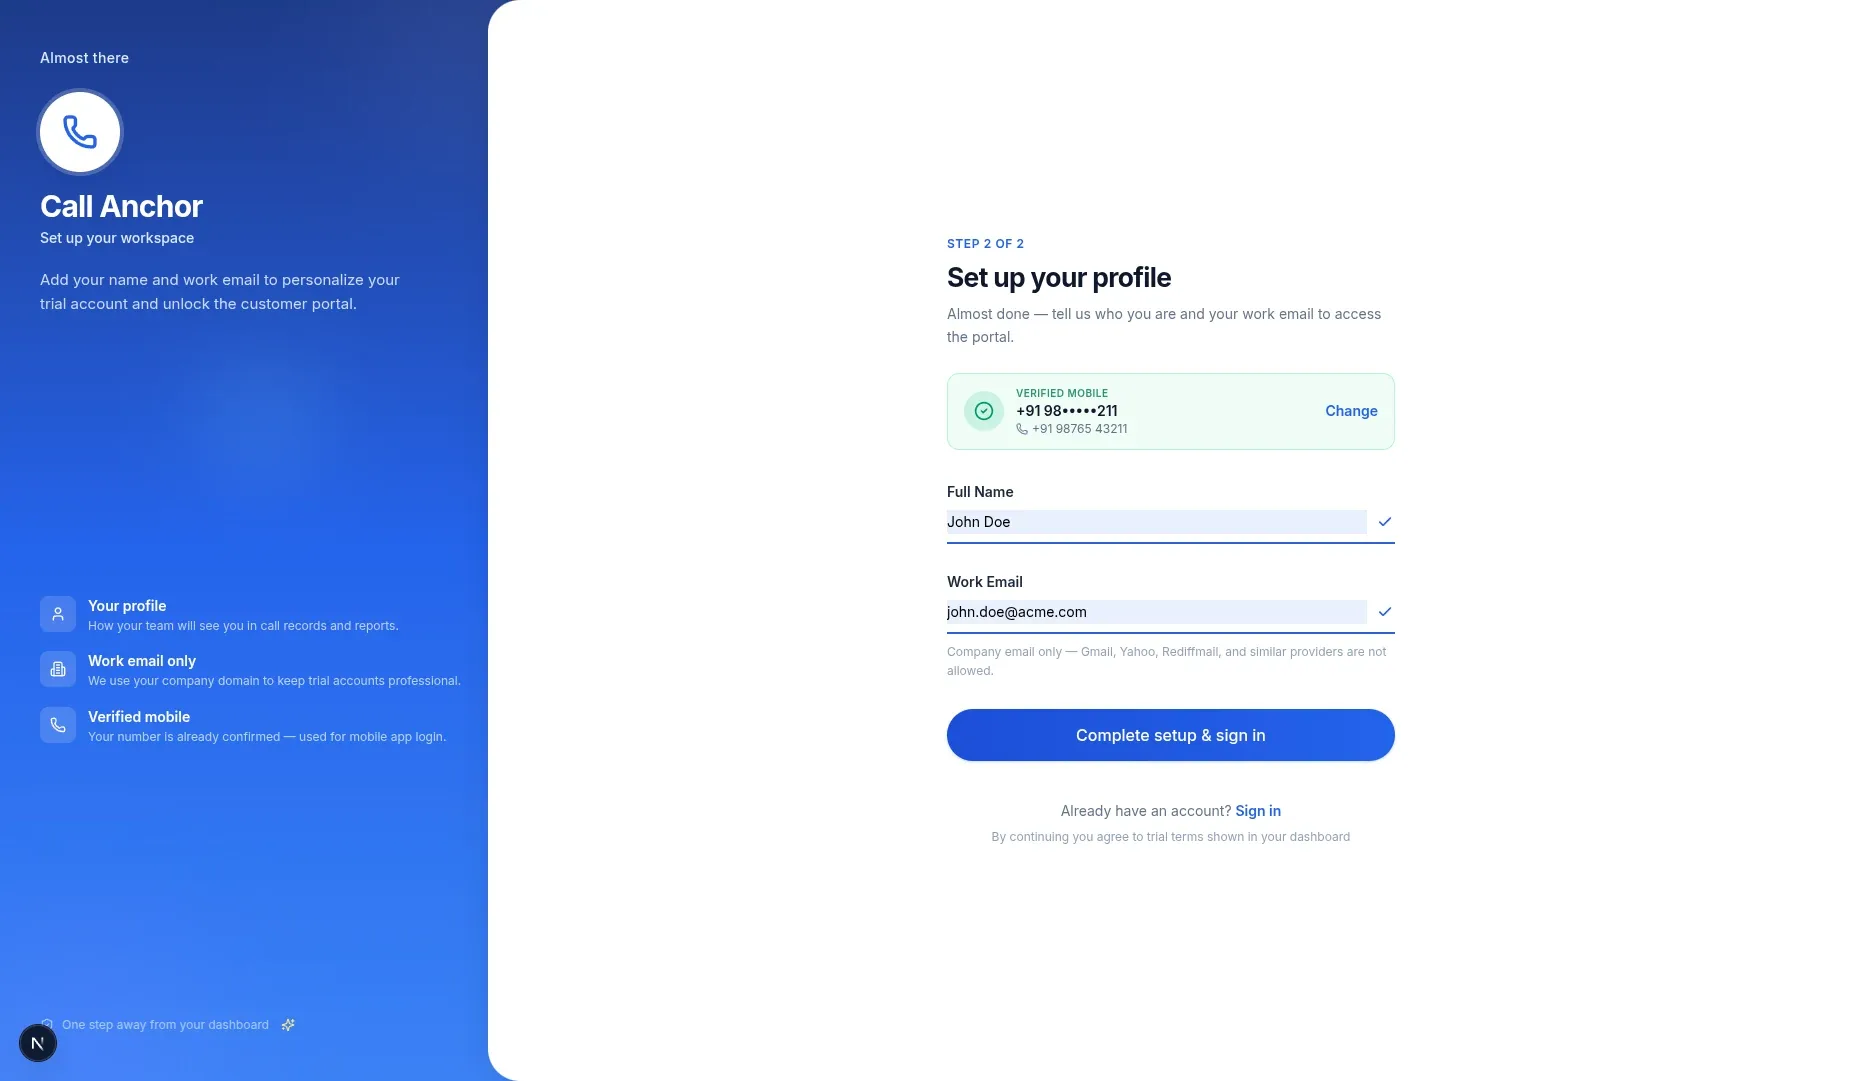
Complete your profile so your calls and synced records are correctly attributed to you.
- Enter your full name, company name, and job title.
- Add your primary phone number.
- Click “Save” / “Continue” to finish setup.
3. Web Portal Navigation
The Call Anchor web portal is where you manage integrations, review synced call activity, and administer your account and licenses. This section walks through each area of the portal.
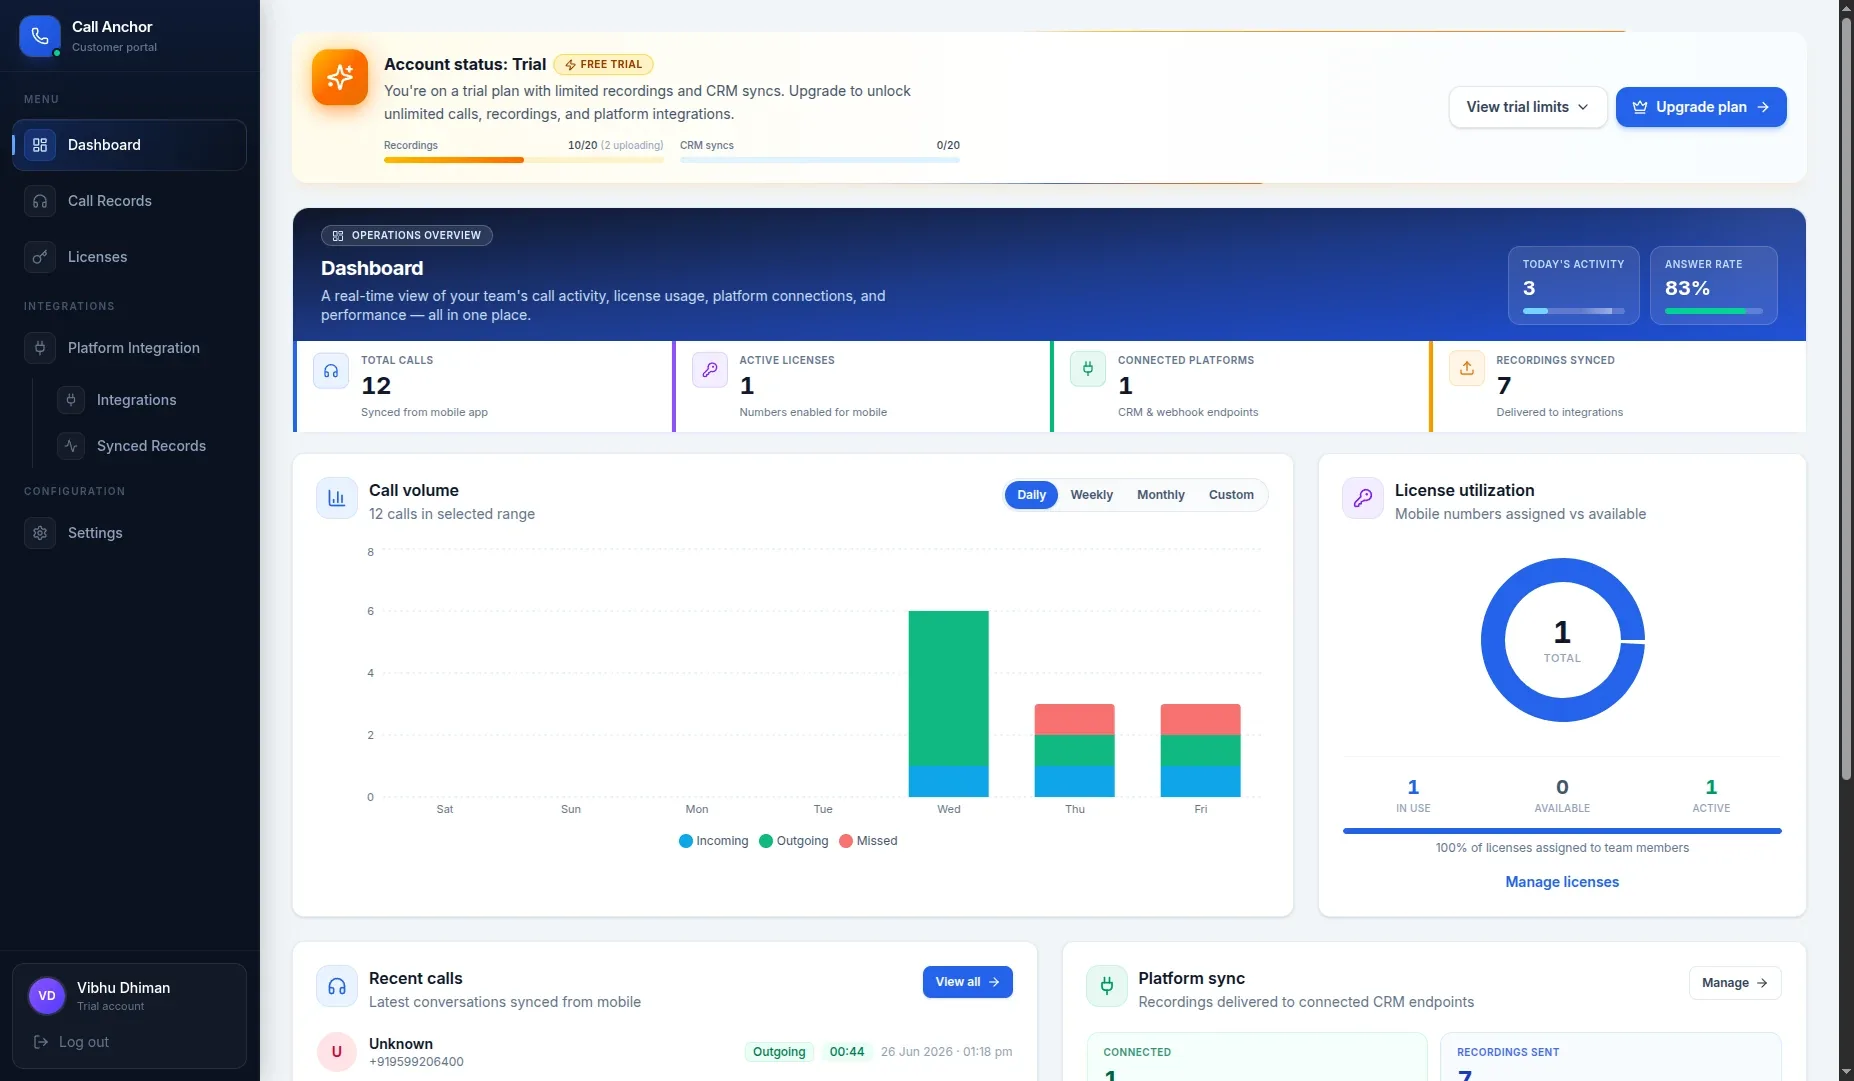
3.1 Dashboard
The Dashboard is the default landing page after login. It gives you an at-a-glance view of your call activity and sync health, including:
- Summary metrics such as total calls, synced calls, and recent activity
- A list or chart of recent calls
- Quick links to CRM setup, platform integrations, and call records
3.2 Call Records
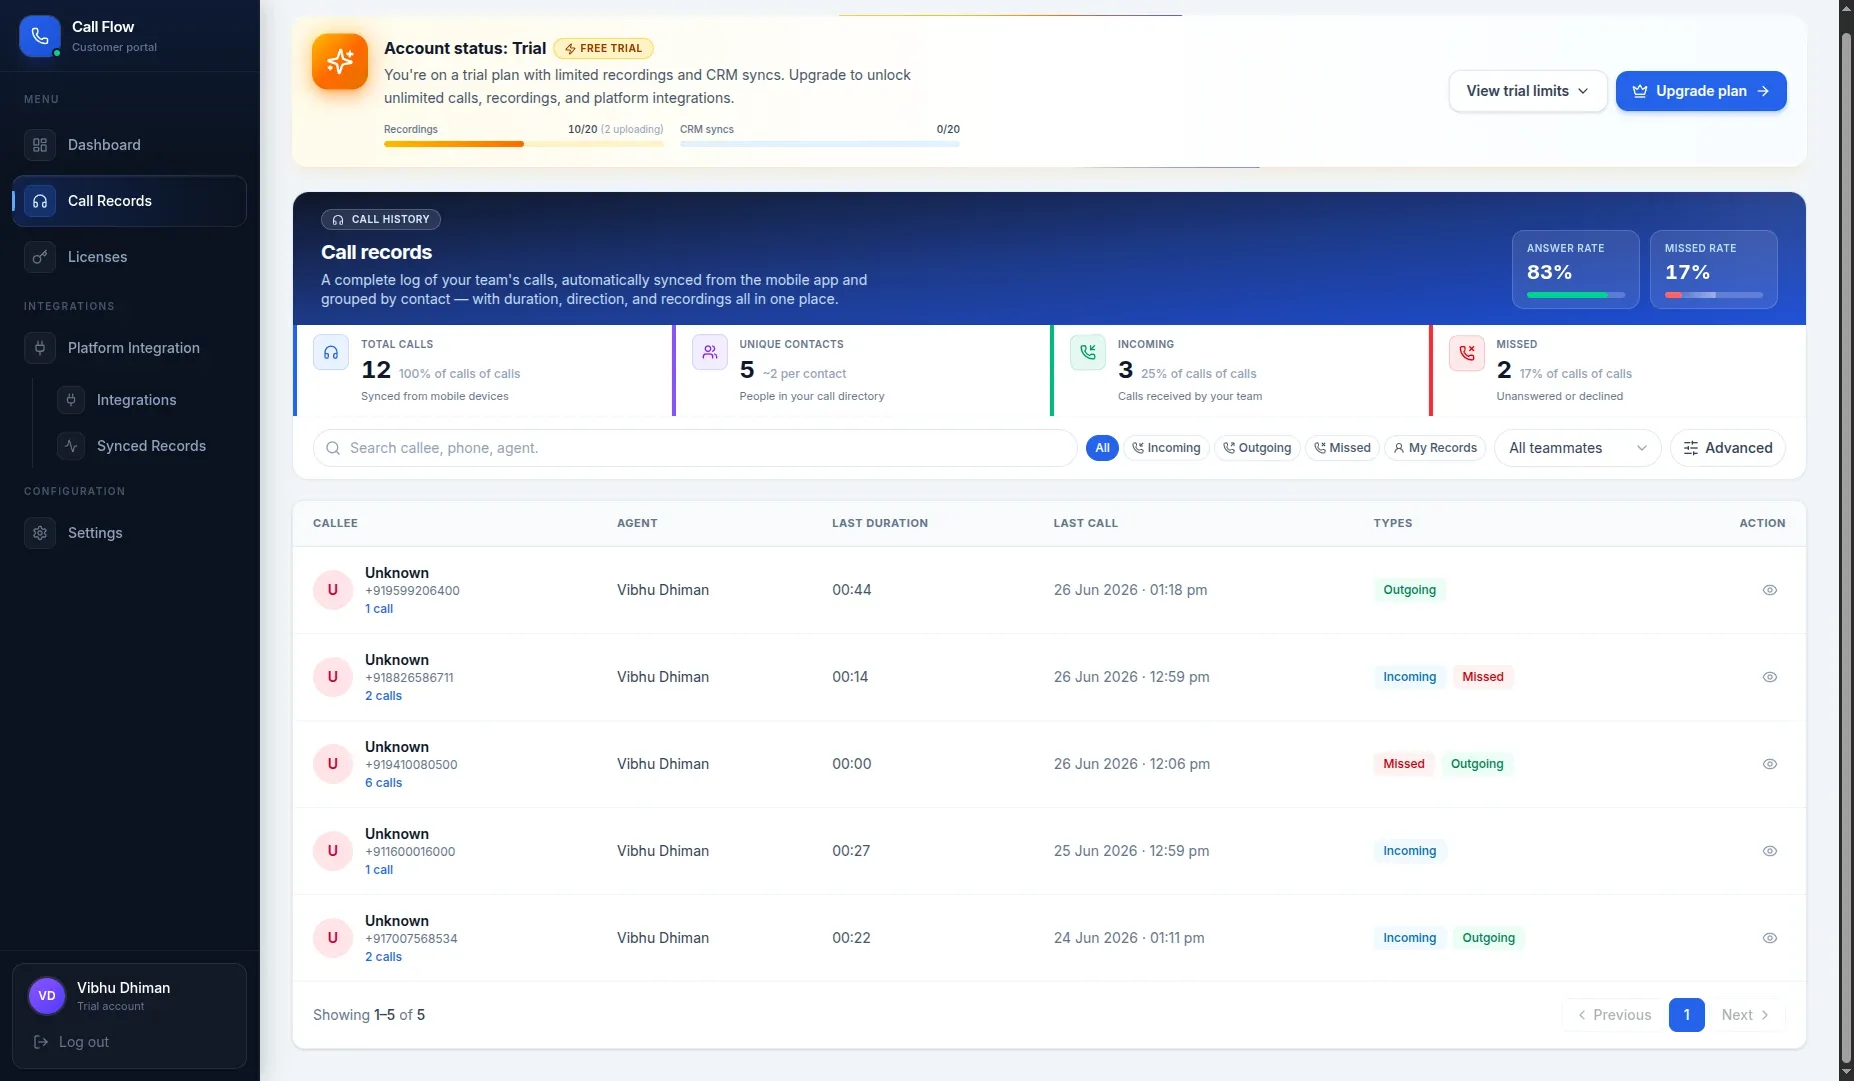
The Call Records list shows every call captured by Call Anchor, whether made from the mobile app or a connected calling platform.
- View caller/contact name, phone number, call duration, date, and direction (inbound/outbound)
- Filter or search calls by contact, date range, or sync status
- Click any row to open the full Call Detail page
3.3 Call Detail Page
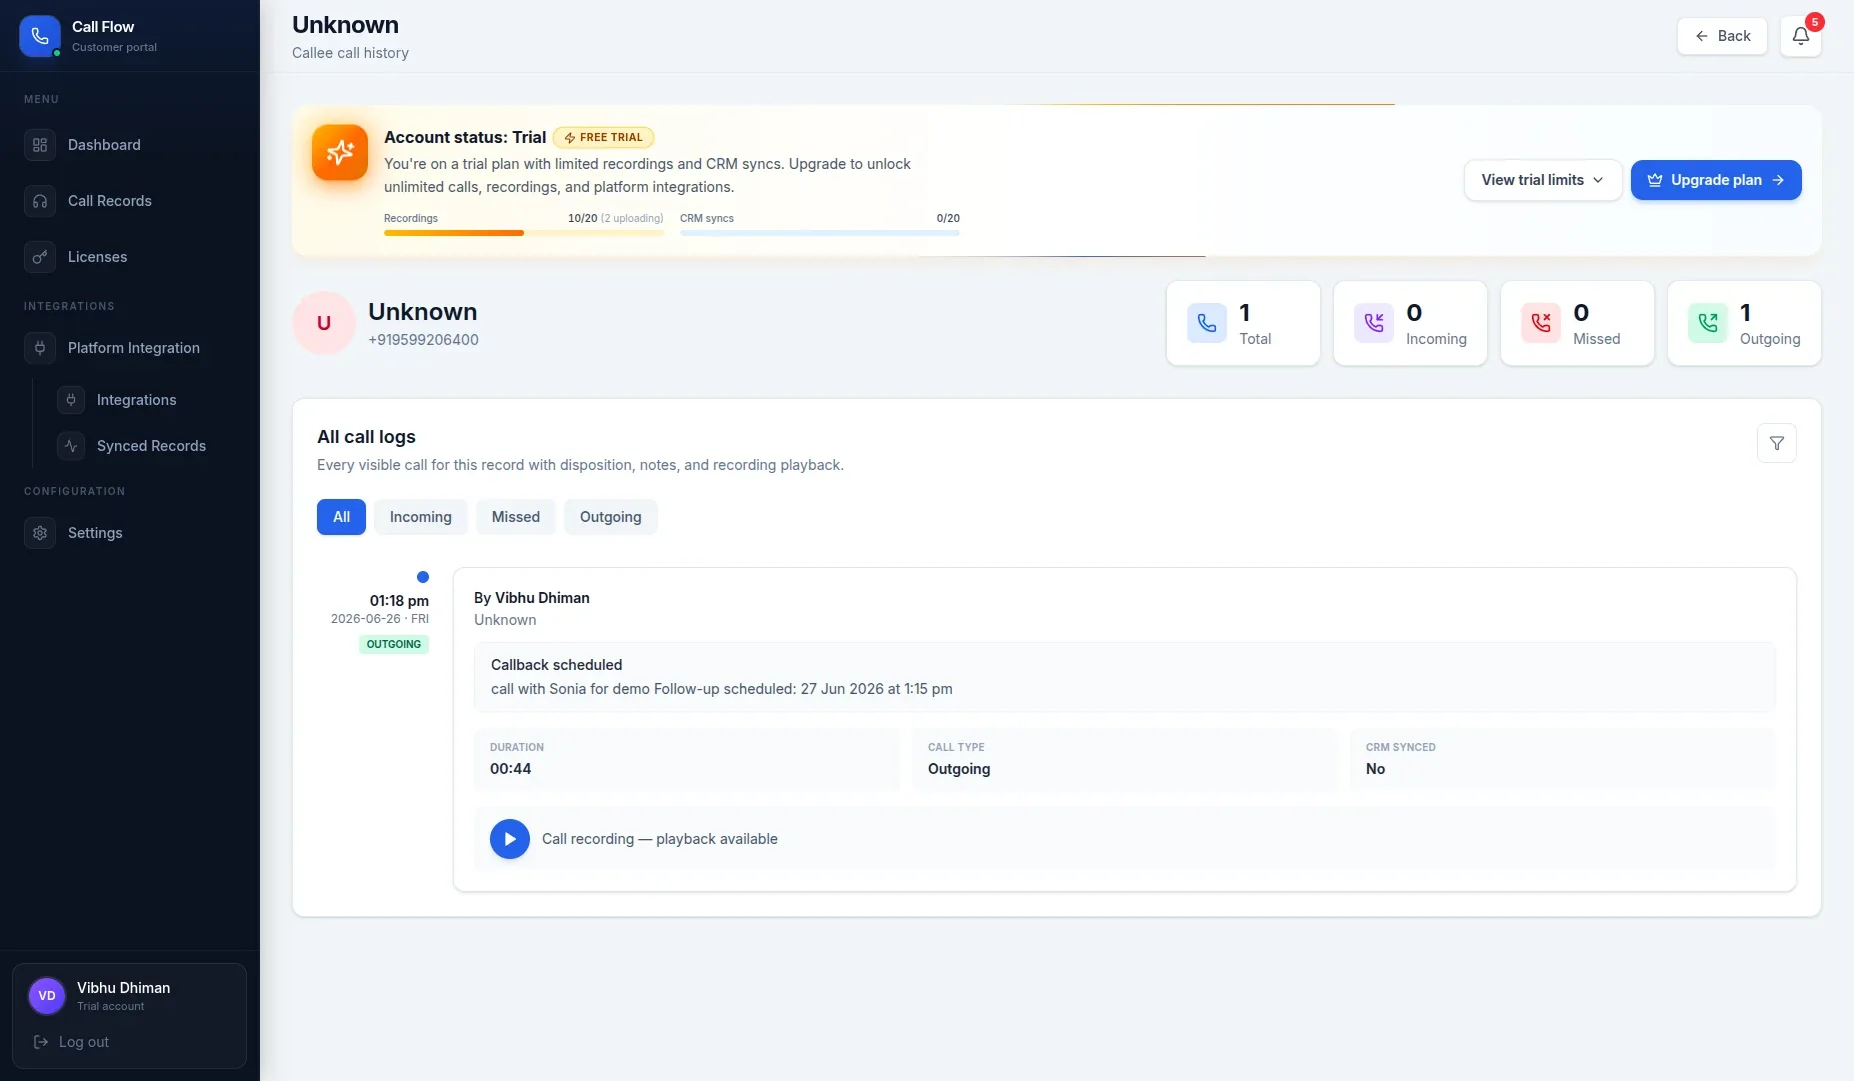
Opening a call record shows the full detail view, including:
- Call recording playback controls
- Call metadata — contact, number, duration, timestamp, disposition
- Notes added after the call
- The linked CRM record, if the call has been synced
3.4 Synced Records
The Synced Records view shows which call records have been pushed to your connected CRM and their current sync status (e.g., Synced, Pending, Failed), so you can quickly confirm your CRM data is up to date.
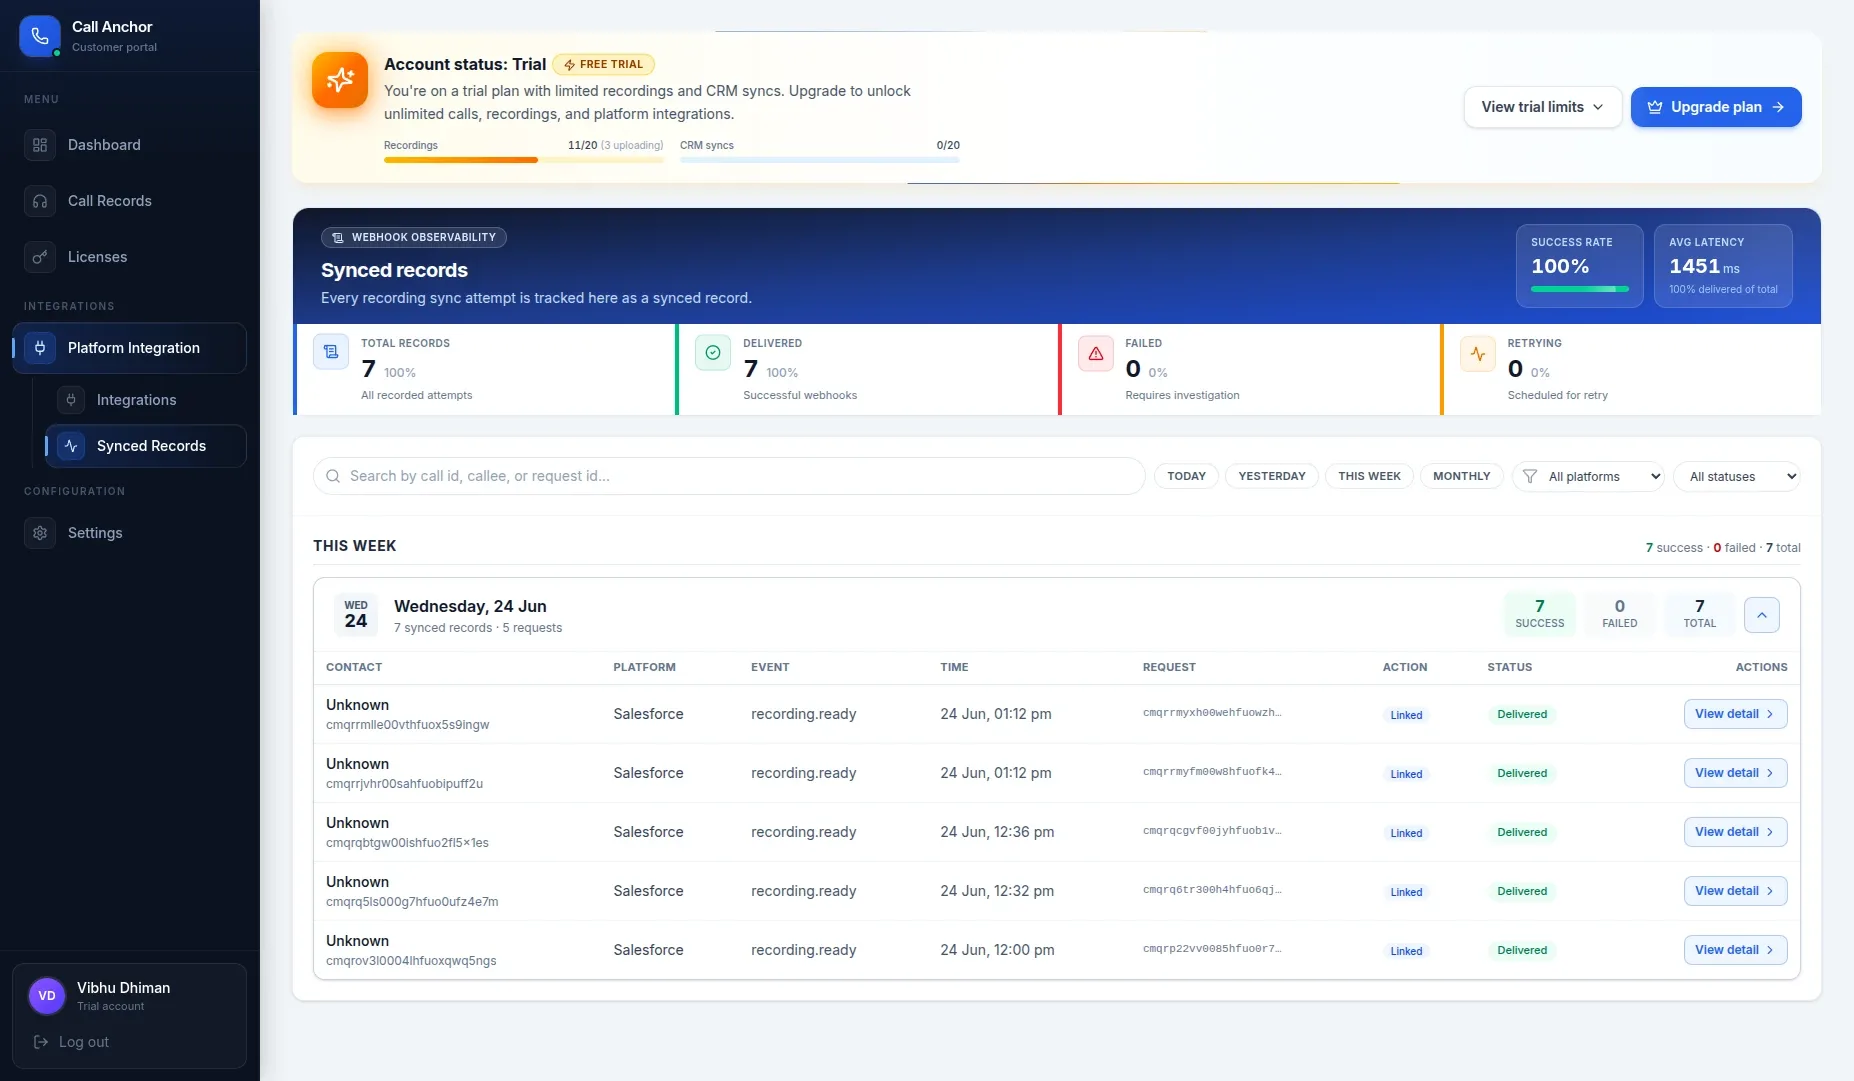
Note: If a record shows a “Failed” sync status, check your CRM connection under Settings → CRM Set-up, then retry the sync.
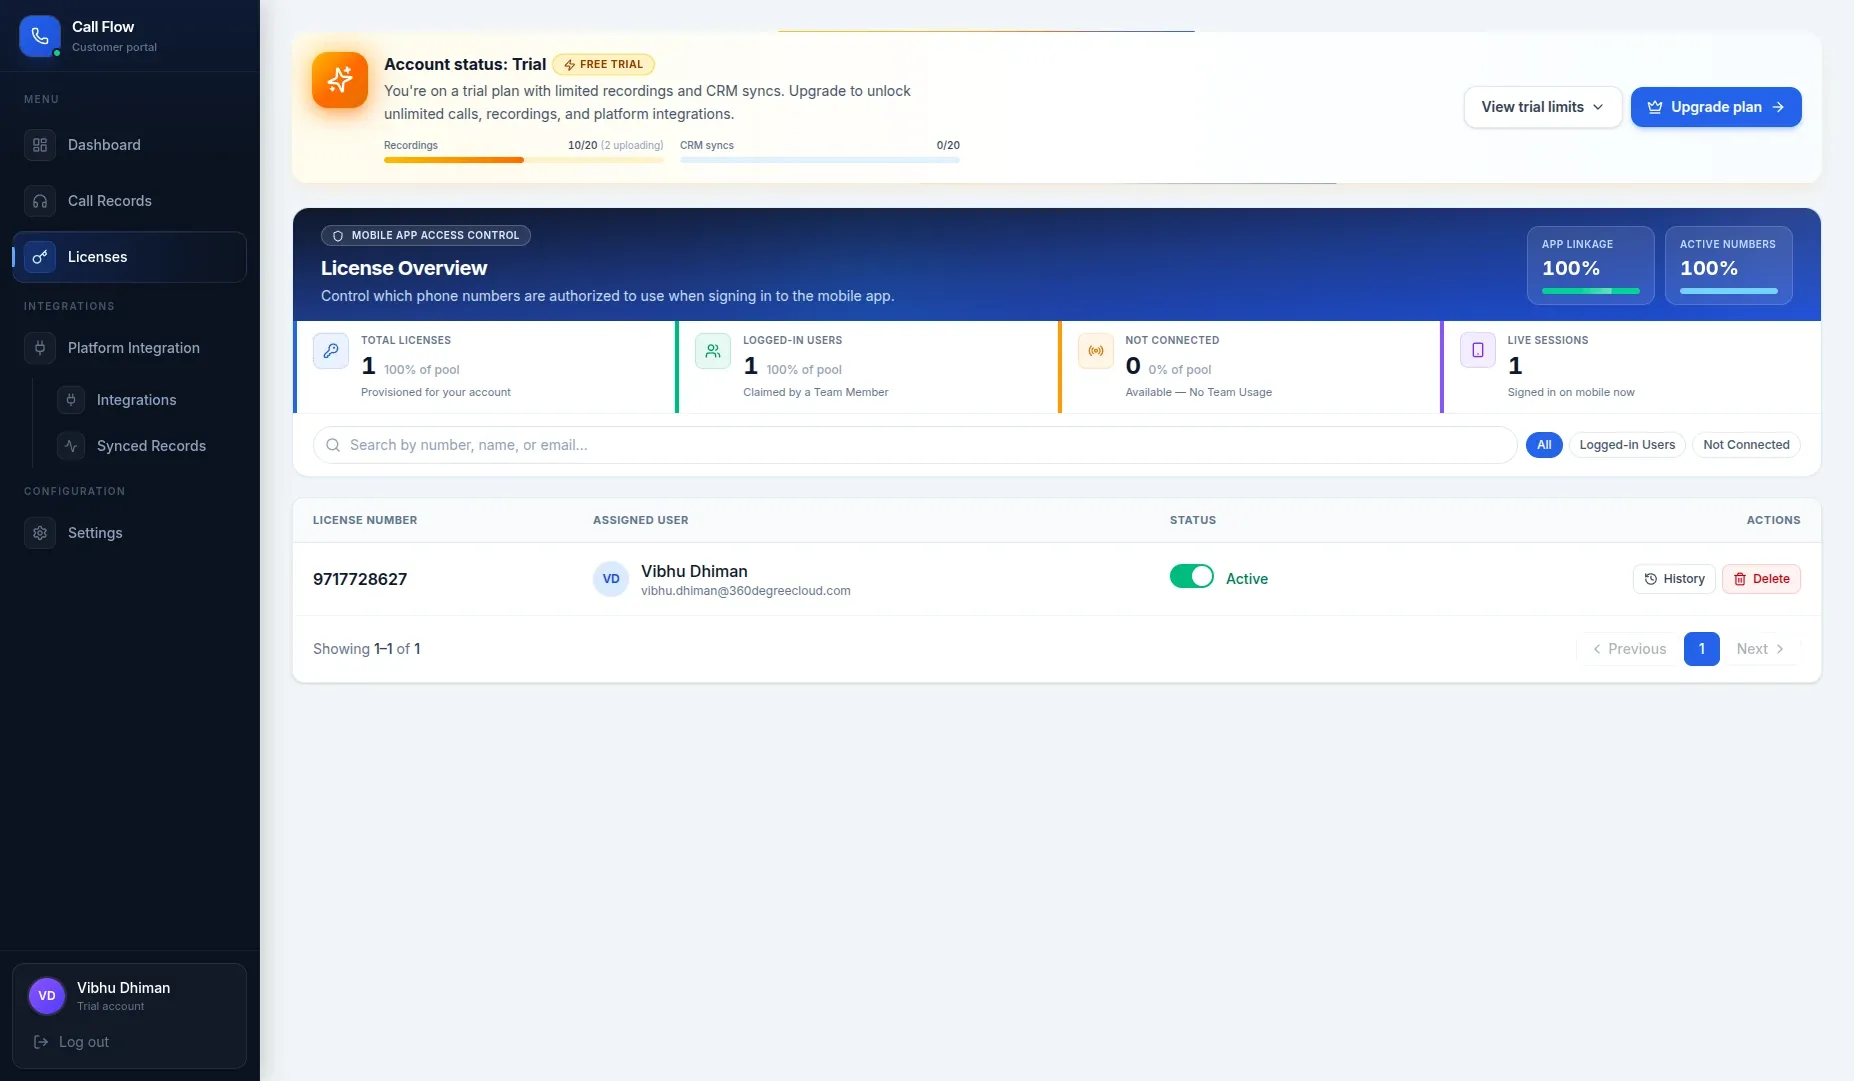
3.5 Licenses
Administrators use the Licenses page to view and manage subscription seats, plan details, and usage across the organization.
- View total vs. used licenses
- See current plan type and renewal/trial status
- Assign or reclaim licenses for team members
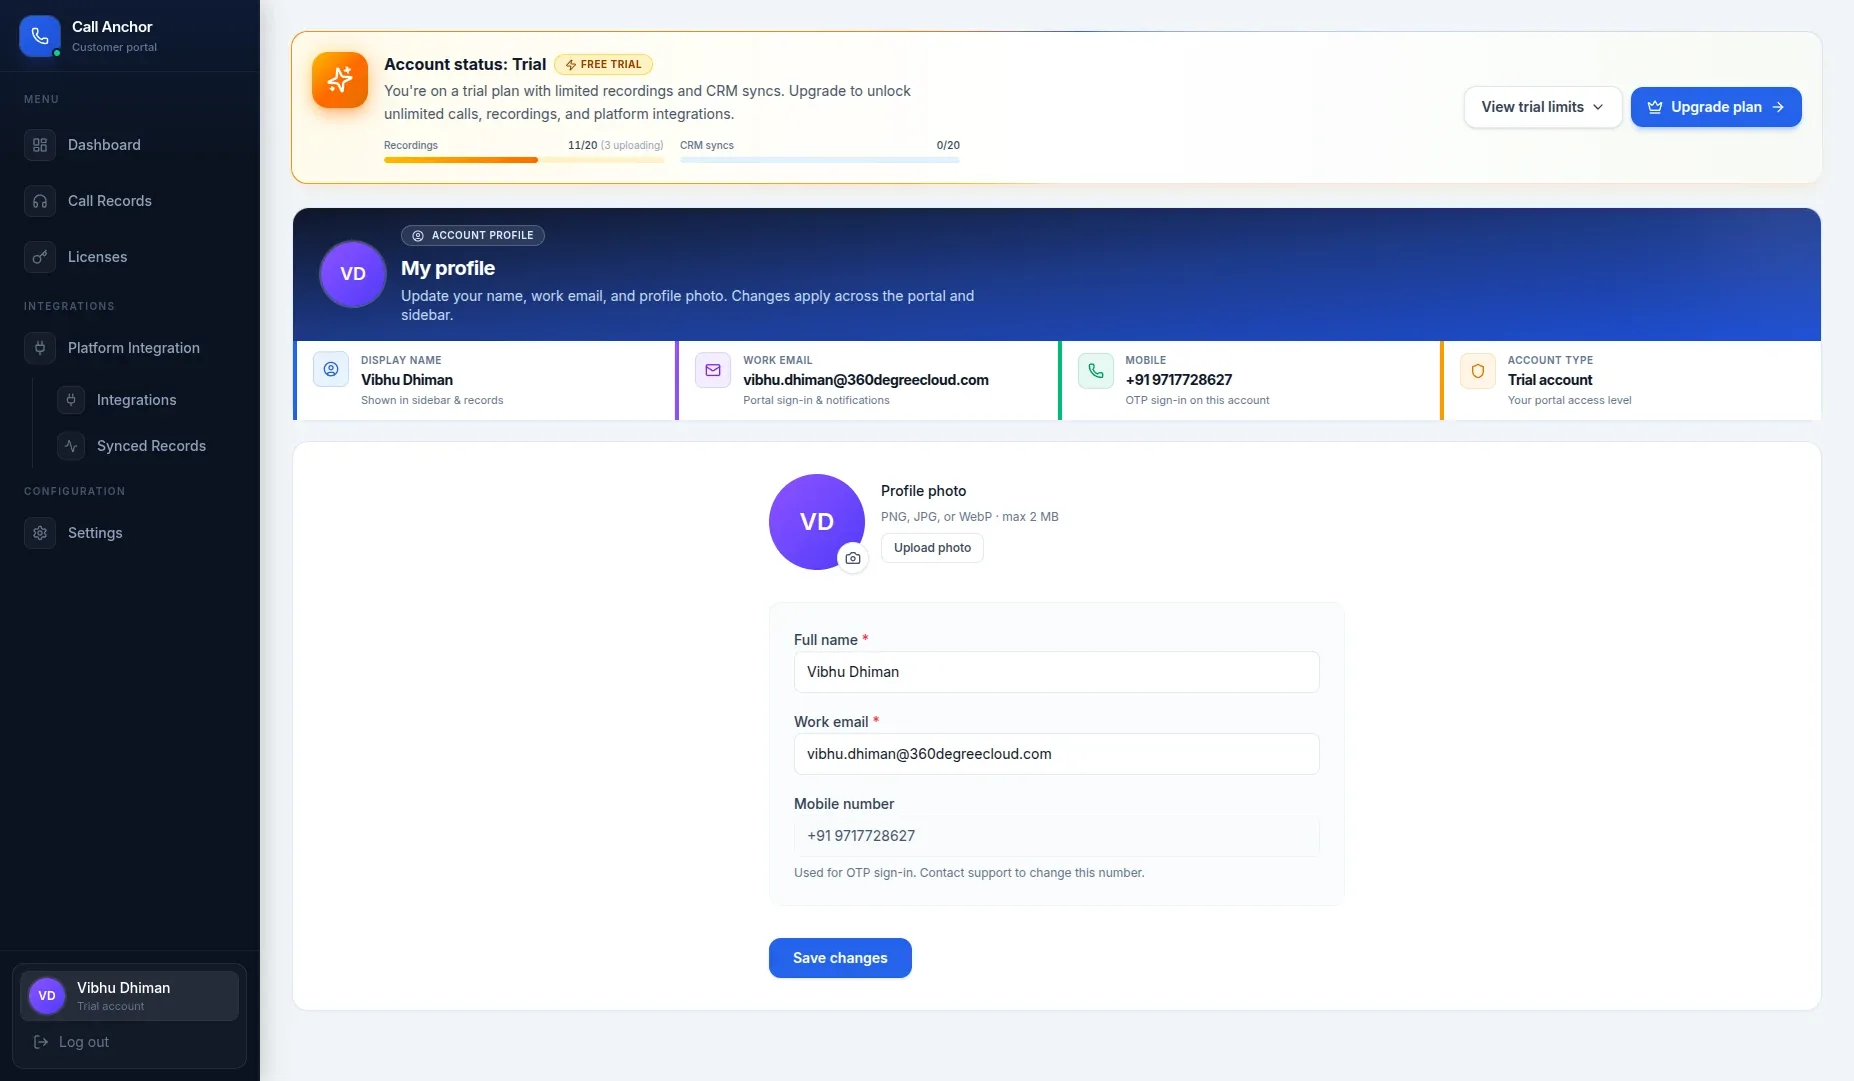
3.6 Profile & Settings
The Profile page displays and lets you edit your personal account details.
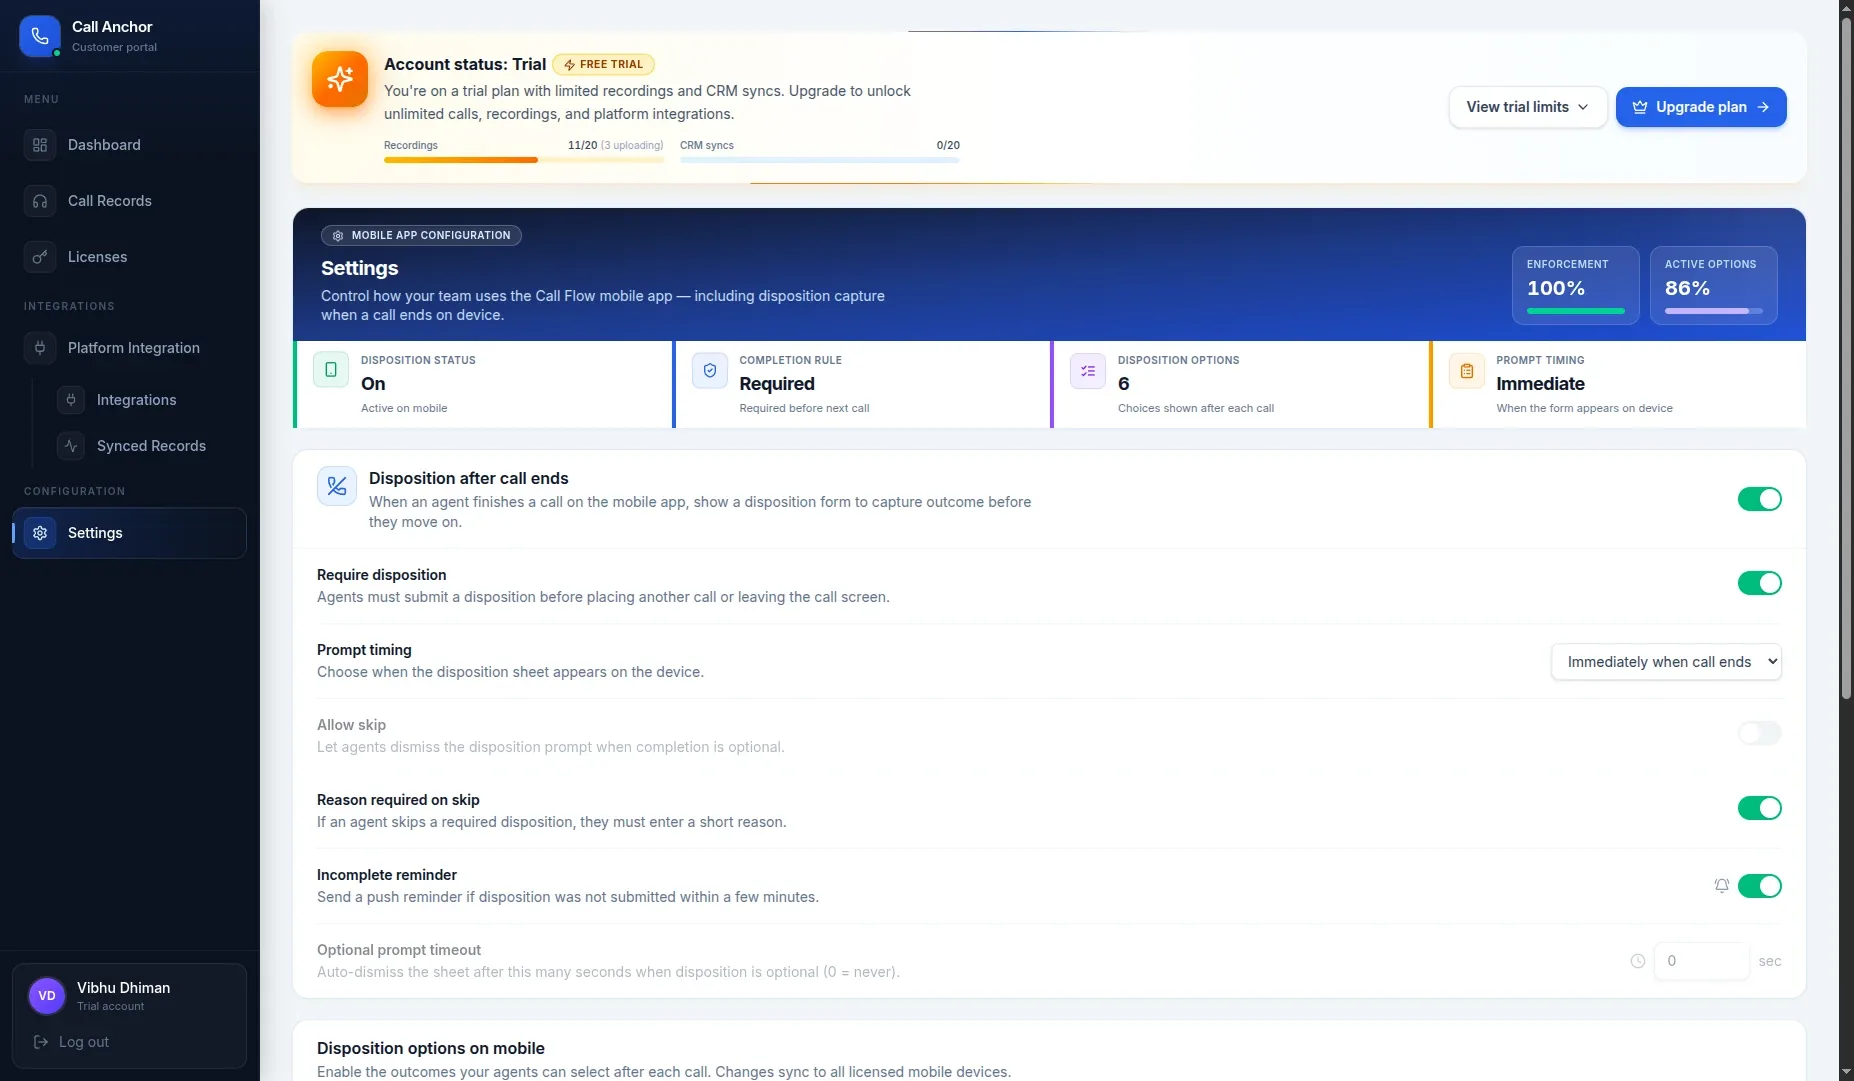
The Settings page is the central configuration hub, covering account preferences, notification options, and links to CRM and platform setup.
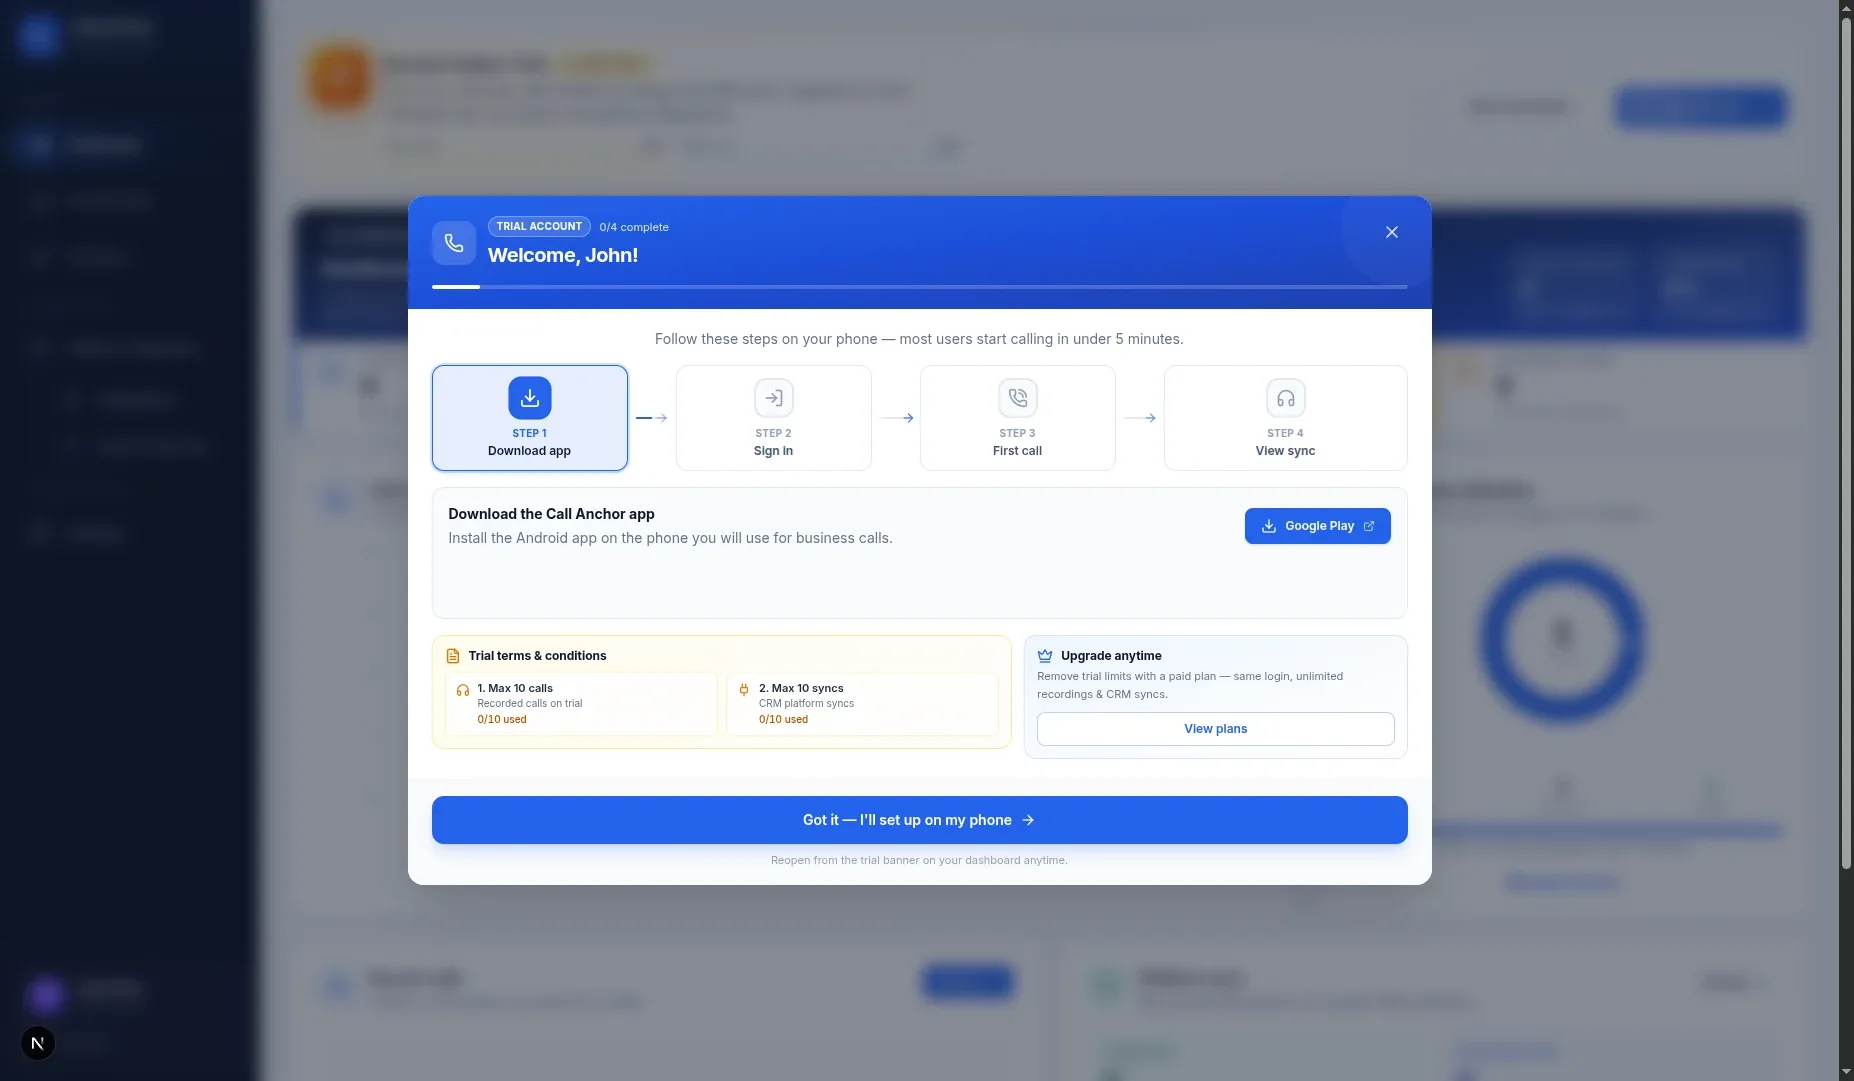
3.7 Tutorial / Help Center
The Tutorial section provides a guided, step-by-step walkthrough of key Call Anchor features for new users and administrators getting started for the first time.
4. CRM & Platform Integration
Connecting your CRM and calling platform is what allows Call Anchor to automatically sync call records, recordings, and notes without manual data entry.
4.1 Connecting Your CRM
- Go to Settings → CRM Set-up.
- Select your CRM provider from the list of supported platforms.
- Click “Connect” and log in with your CRM credentials when prompted.
- Approve the authorization request to allow Call Anchor to read and write call data.
- Once connected, the CRM Set-up page shows a “Connected” status.
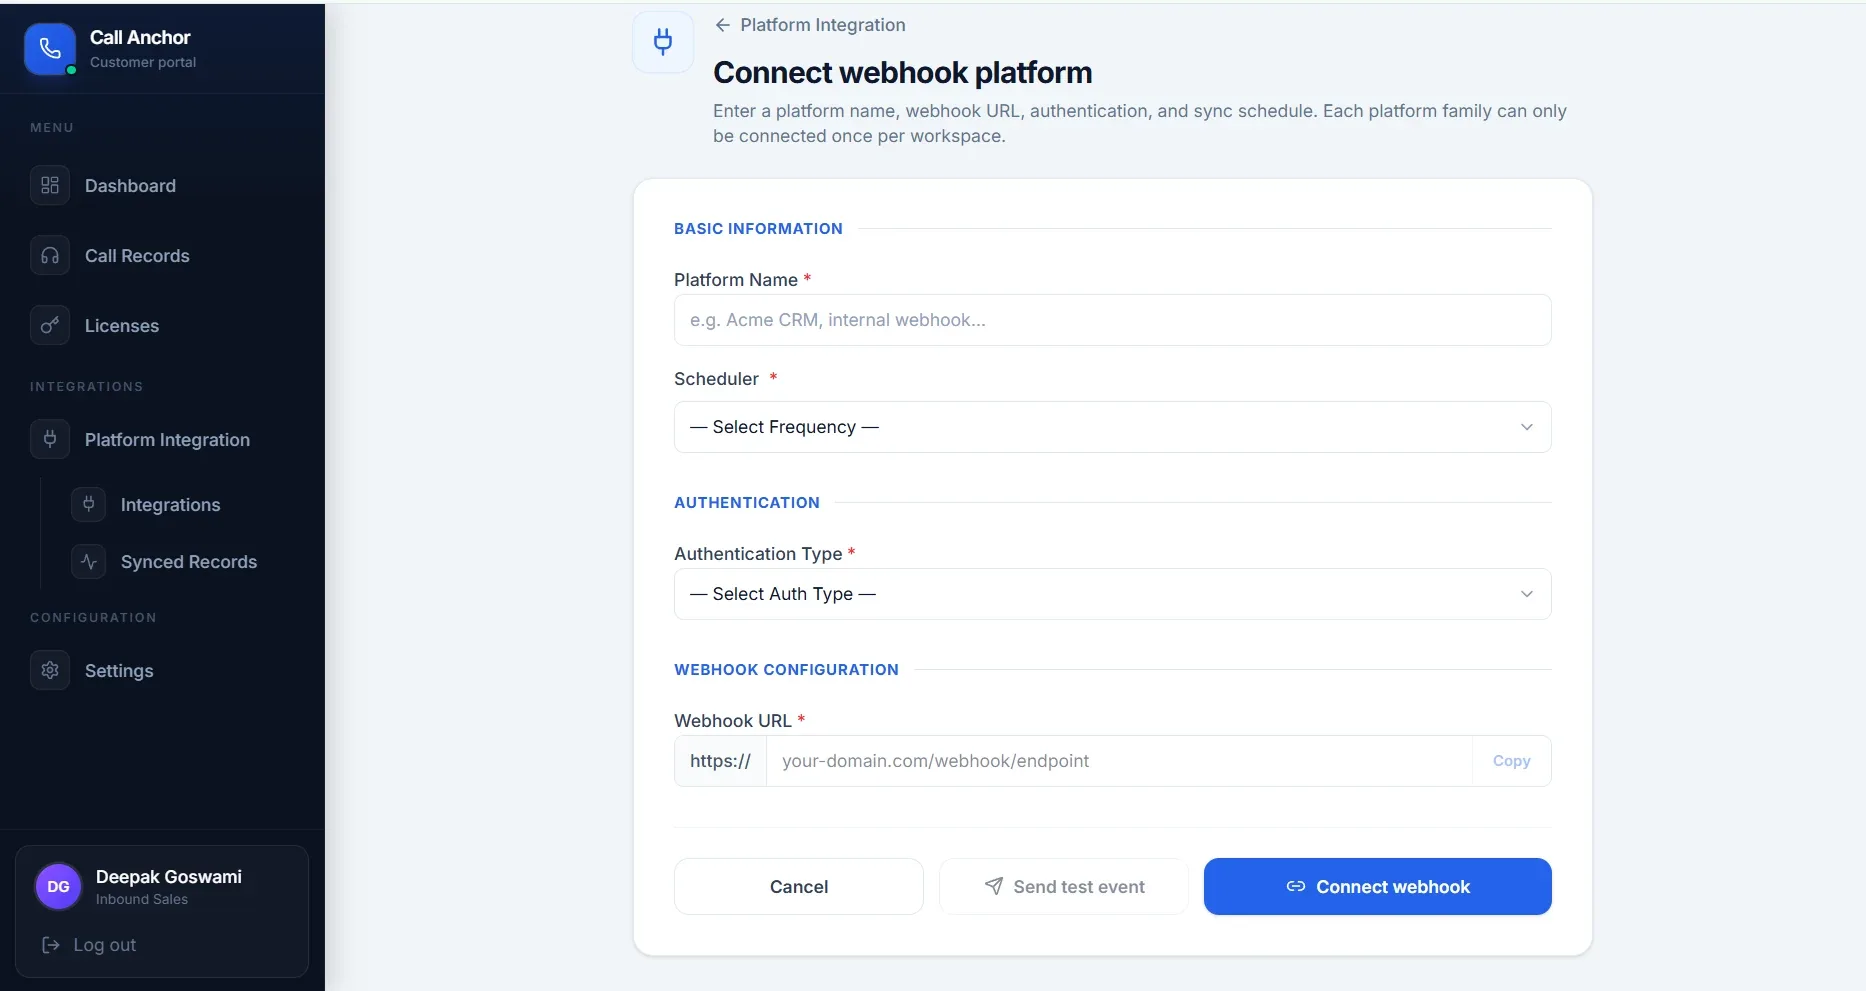
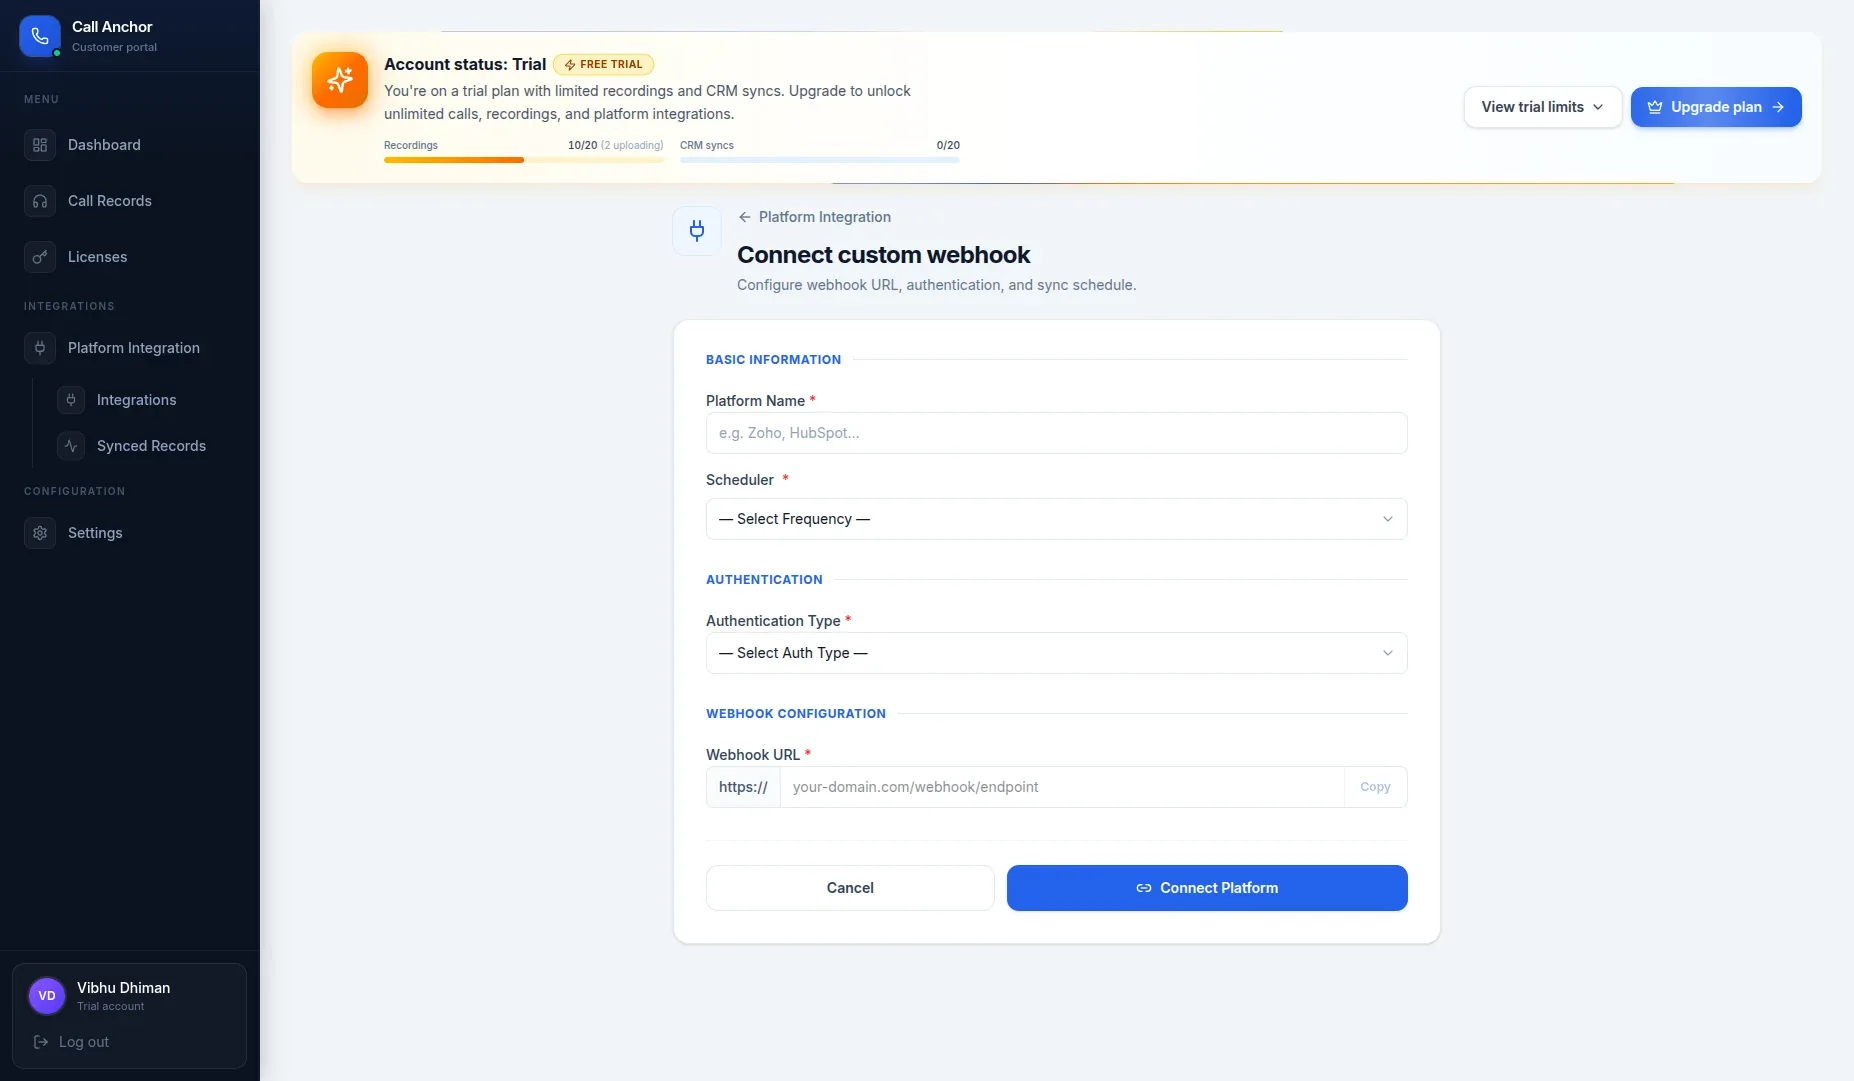
4.2 Platform Setup
Platform Setup lets you configure which calling platform(s) Call Anchor should capture calls from — for example, your mobile carrier line, a VoIP system, or a connected dialer.
- Navigate to Settings → Platform Setup.
- Choose the calling platform you want to connect.
- Follow the on-screen prompts to authenticate and authorize access.
- Confirm the platform appears with an “Active” status once setup is complete.
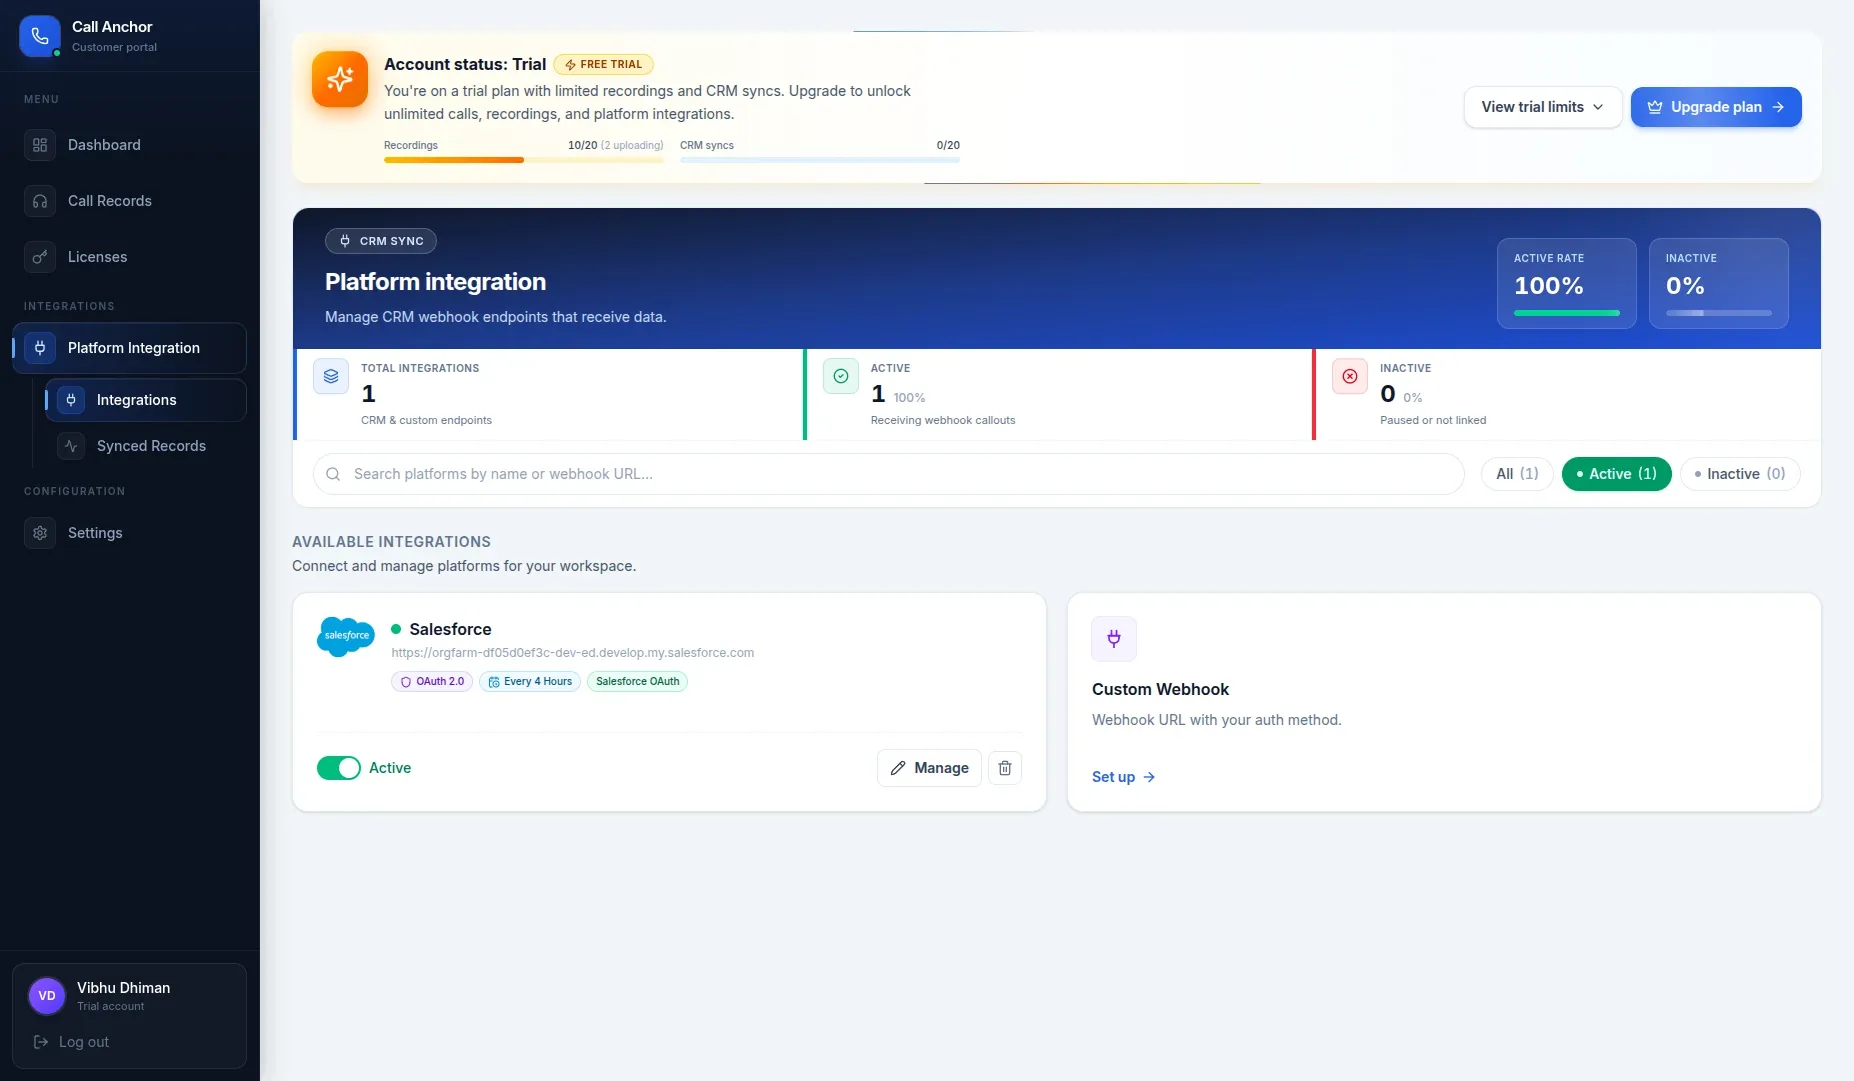
4.3 Managing Platform Integrations
The Platform Integration page lists all available and connected integrations in one place, so you can review, add, or remove connections as your calling stack changes.
5. Mobile App Guide
The Call Anchor mobile app captures calls directly from your phone, prompts you to record the outcome as soon as a call ends, and keeps everything in sync with the web portal and your CRM. This section walks through installation, login, and day-to-day use of the app.
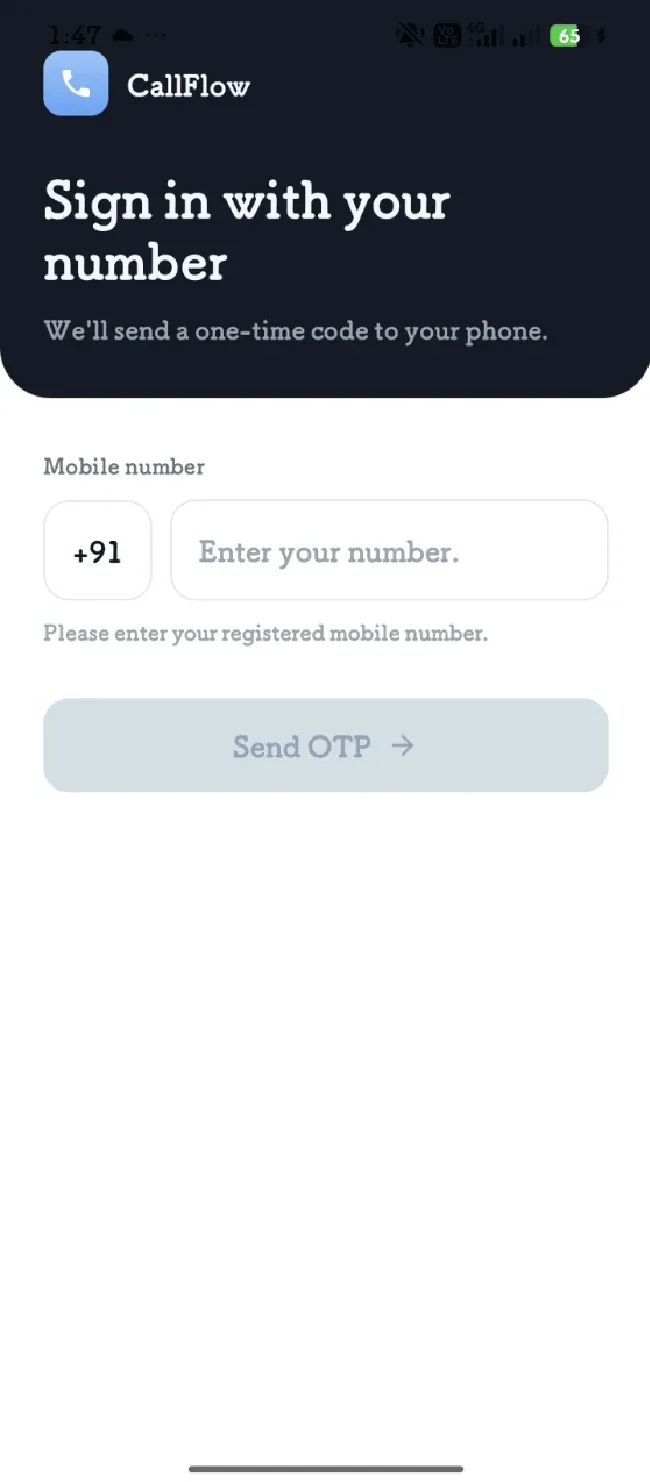
5.1 Installing and Signing In
- Download “Call Anchor” from the Google Play (Android).
- Open the app and tap “Sign in with your number.”
- Enter your registered mobile number.
- Tap “Send OTP” to receive a one-time verification code.
5.2 Verifying Your Number (OTP)
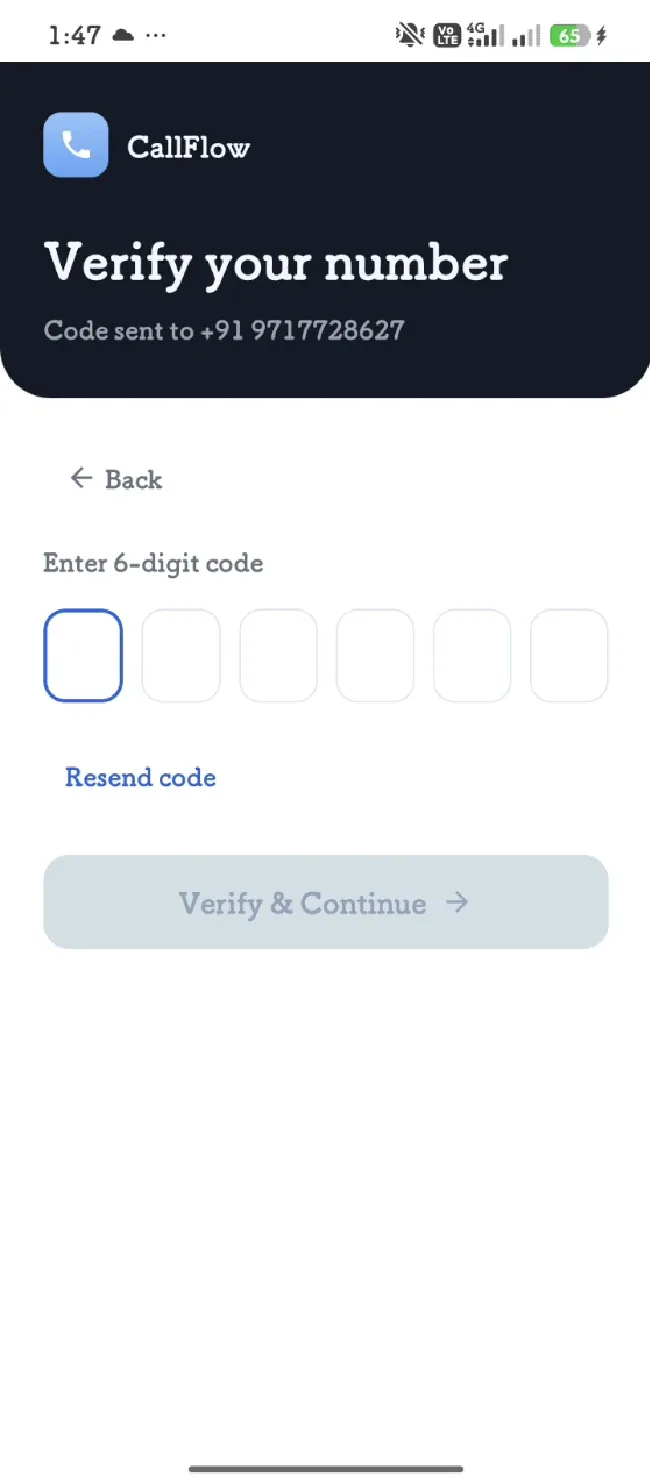
Enter the 6-digit code sent to your mobile number to complete sign-in. This is the same OTP flow used on the web portal (Section 2.2).
- Enter the 6-digit code sent by SMS.
- Tap “Verify & Continue.”
- If the code doesn’t arrive, tap “Resend code.”
5.3 Granting App Permissions
On first login, Call Anchor requests a few device permissions it needs to detect, record, and enrich your calls. All of the following are required for the app to function correctly:
- Phone — to detect when you make or receive calls and sync call history automatically
- Microphone — to record calls for review and disposition
- Contacts — to match calls with your saved contacts automatically
- Display over other apps — to show the disposition prompt when a call ends
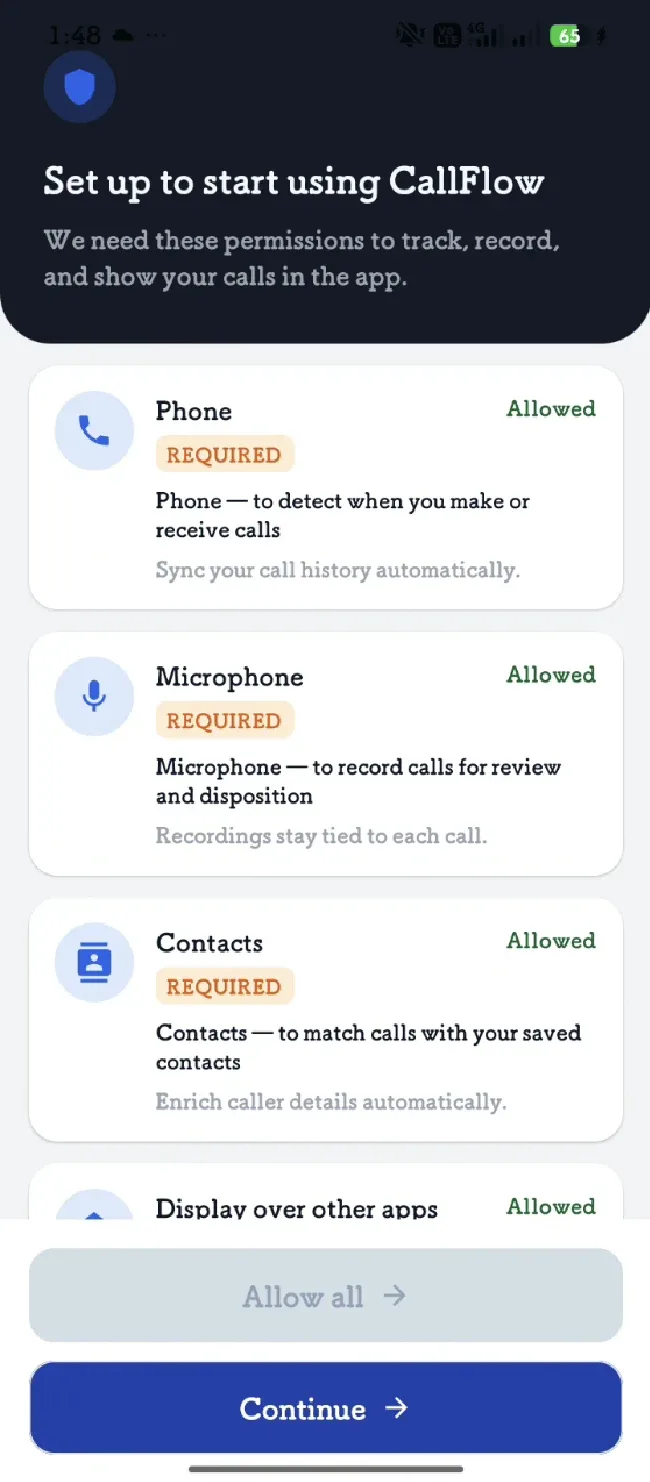
Note: If you deny a required permission, related features (such as automatic call detection or the disposition prompt) won’t work. You can re-enable permissions any time from your phone’s system Settings.
5.4 Home Dashboard
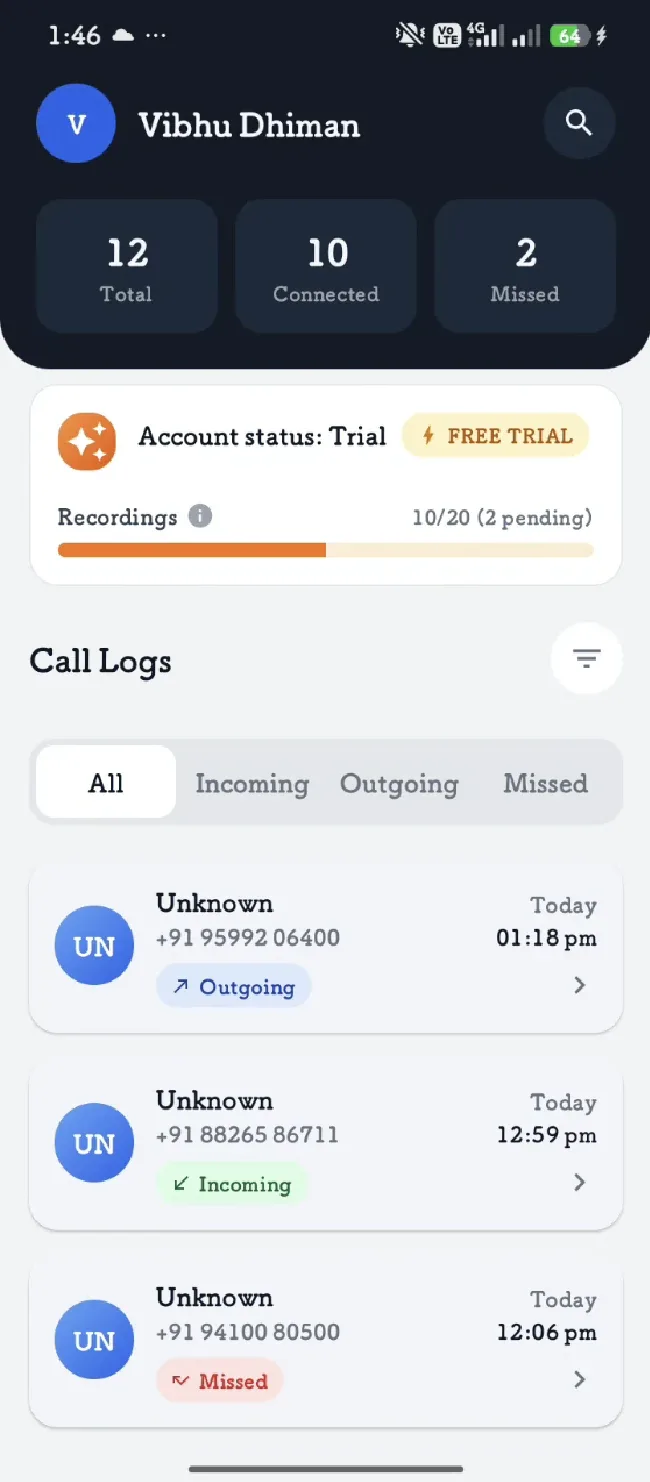
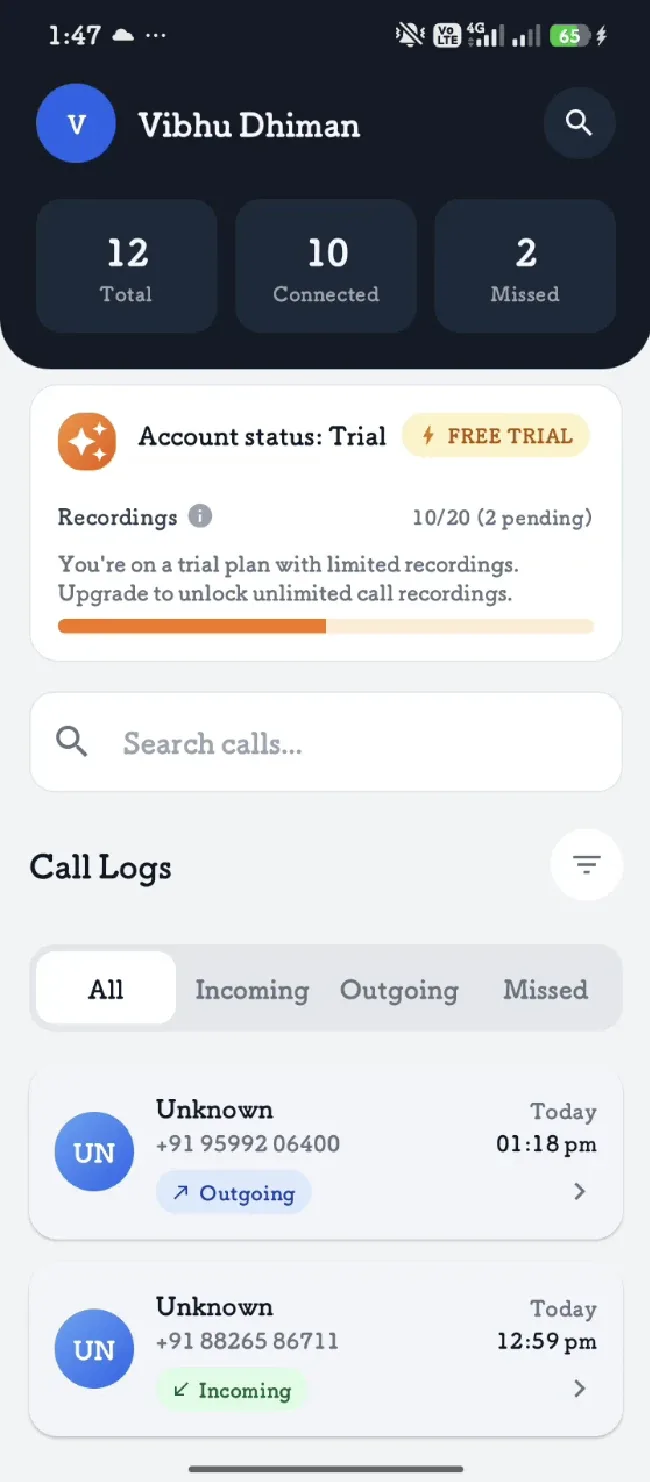
After signing in, the Home screen shows your call totals (Total, Connected, Missed), your trial/recording usage, and your full Call Logs list — filterable by All, Incoming, Outgoing, or Missed.
5.5 Viewing Call History & Recordings
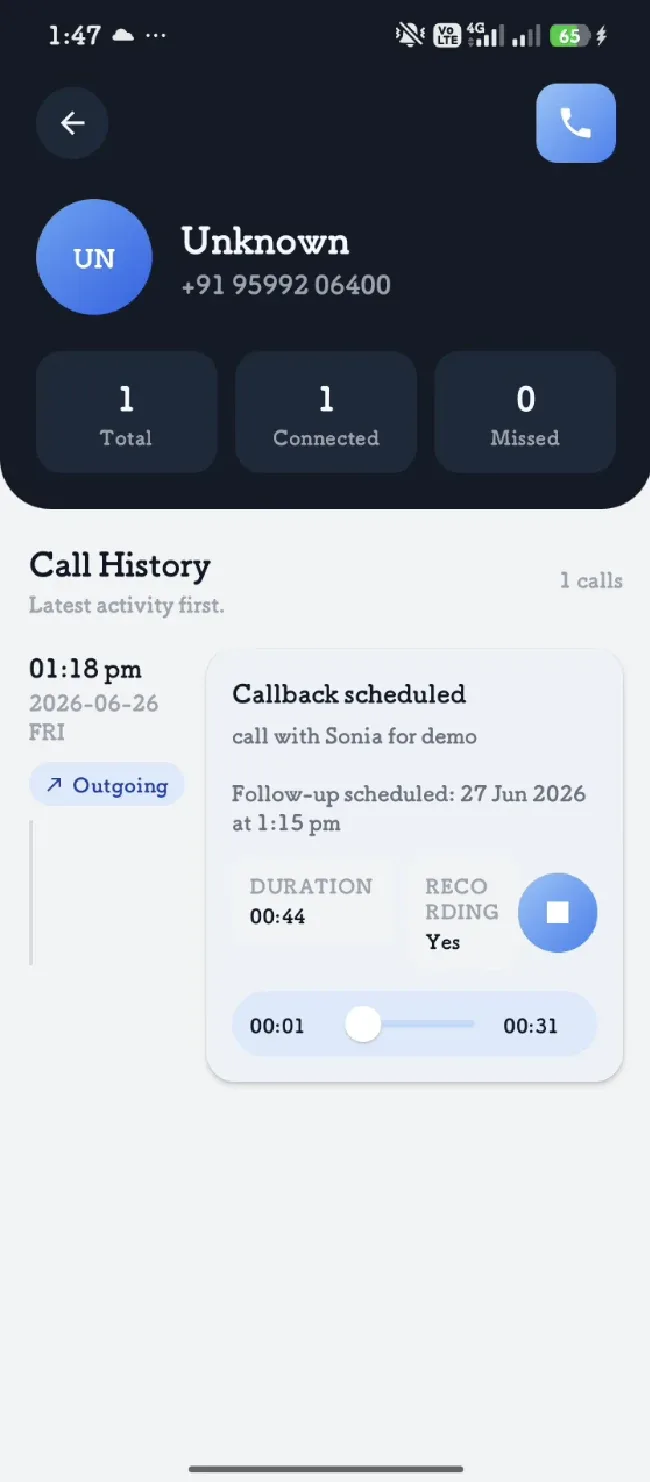
Tap any call in the Call Logs list to open its detail view. This shows every logged interaction with that contact, along with call duration, disposition notes, and a recording playback control — the same information available from the web portal’s Call Detail page (Section 3.3).
5.6 Call Disposition & CRM Sync
As soon as a call ends, Call Anchor automatically shows a disposition pop-up on top of your phone’s dialer screen. This is where you capture the outcome of the call before moving on — and it’s what triggers the record to sync to your CRM. How it works
- End the call as you normally would from your phone.
- The disposition pop-up appears automatically over the dialer, pre-filled with the call’s number and duration.
- Select an Outcome — for example Interested, Callback scheduled, or Not interested.
- Select the Call type — Personal or Business.
- Add Notes summarizing the conversation (optional but recommended).
- If a follow-up is needed, set the Schedule follow-up date and time.
- Tap Save. The call, its disposition, and recording (for Business calls) are synced to your connected CRM automatically — no manual step required.
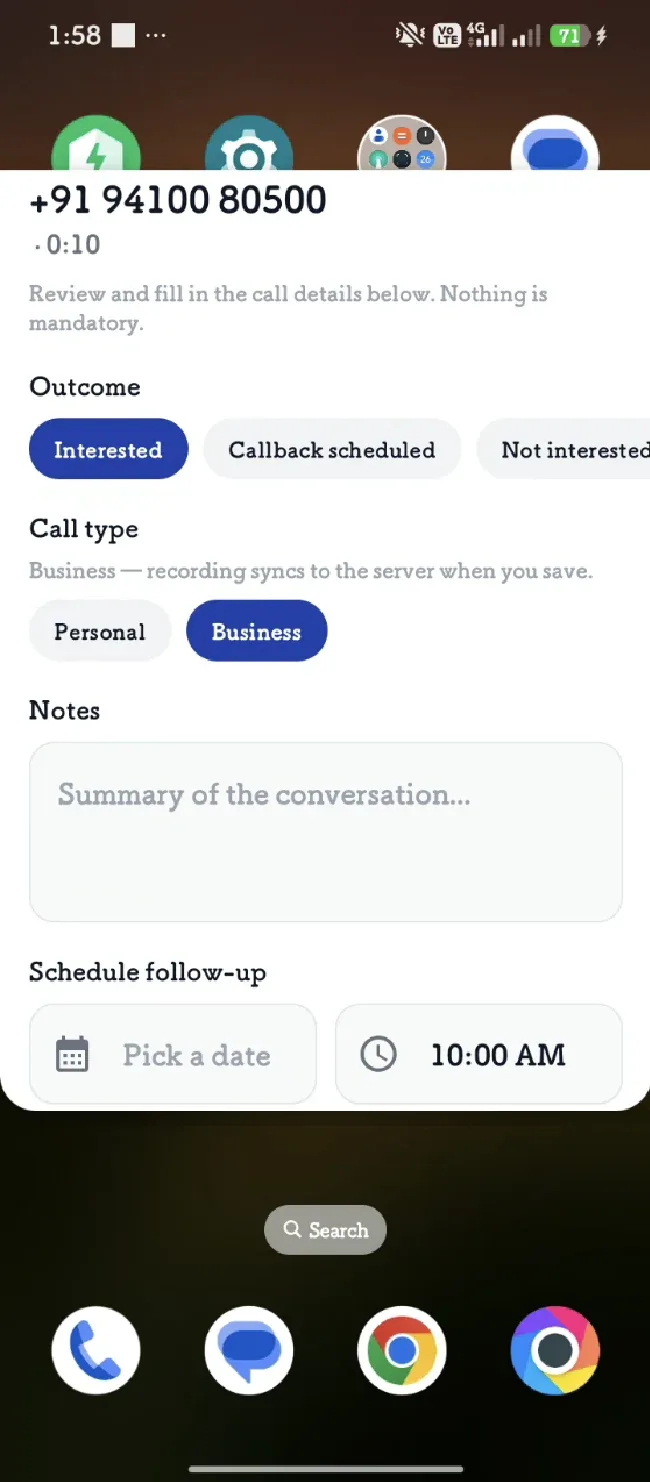
Important: The Call type you select determines what gets synced. Business calls sync their recording to the server when you save; Personal calls are logged but their recordings are not uploaded. Choose the correct type before saving.
Tip: Filling in the disposition immediately after each call keeps your CRM records accurate and gives your team a reliable follow-up trail — skip it and the call is still logged, but without outcome, notes, or a scheduled follow-up.
5.7 Profile & App Settings
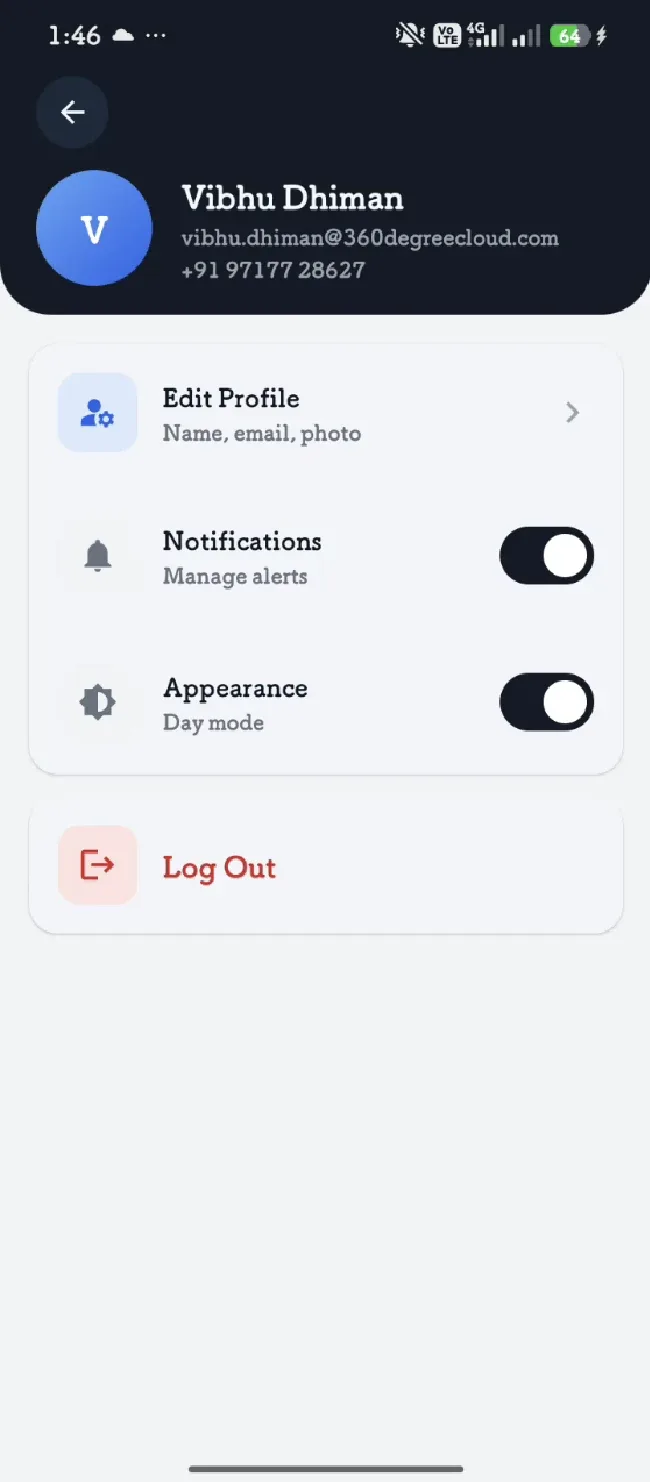
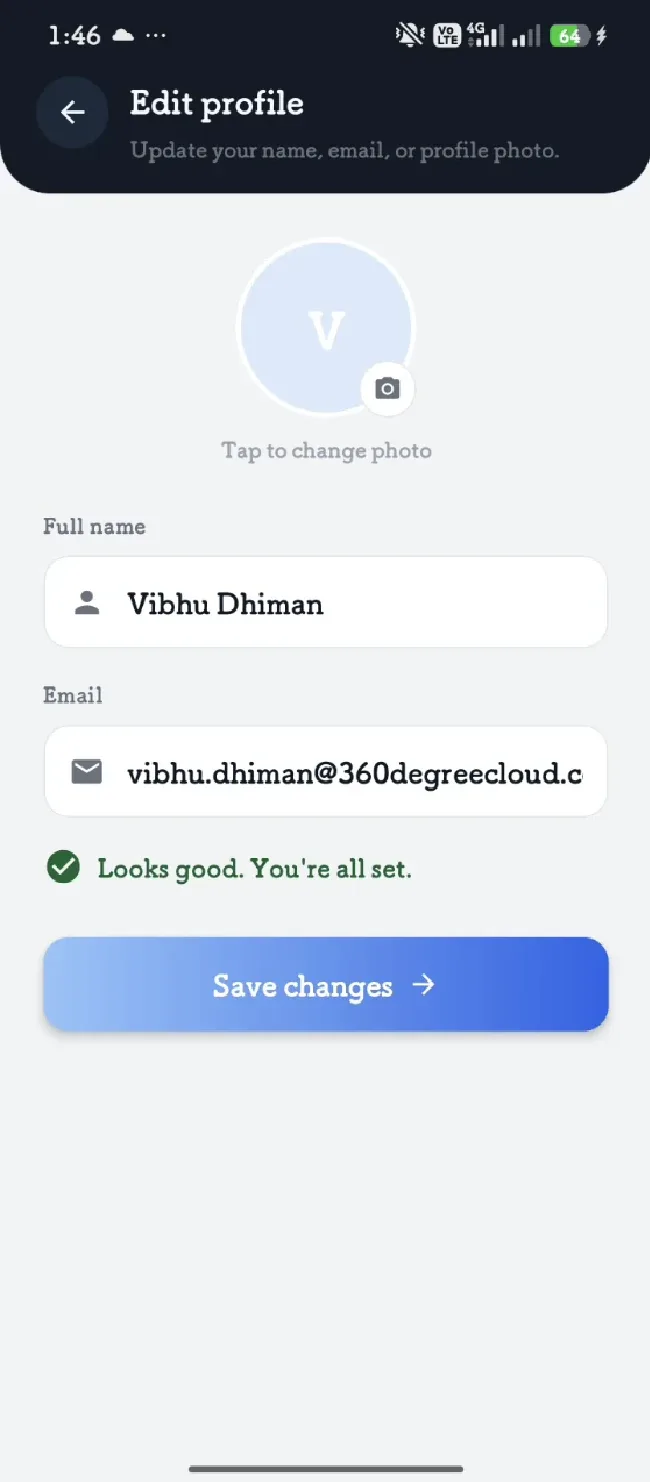
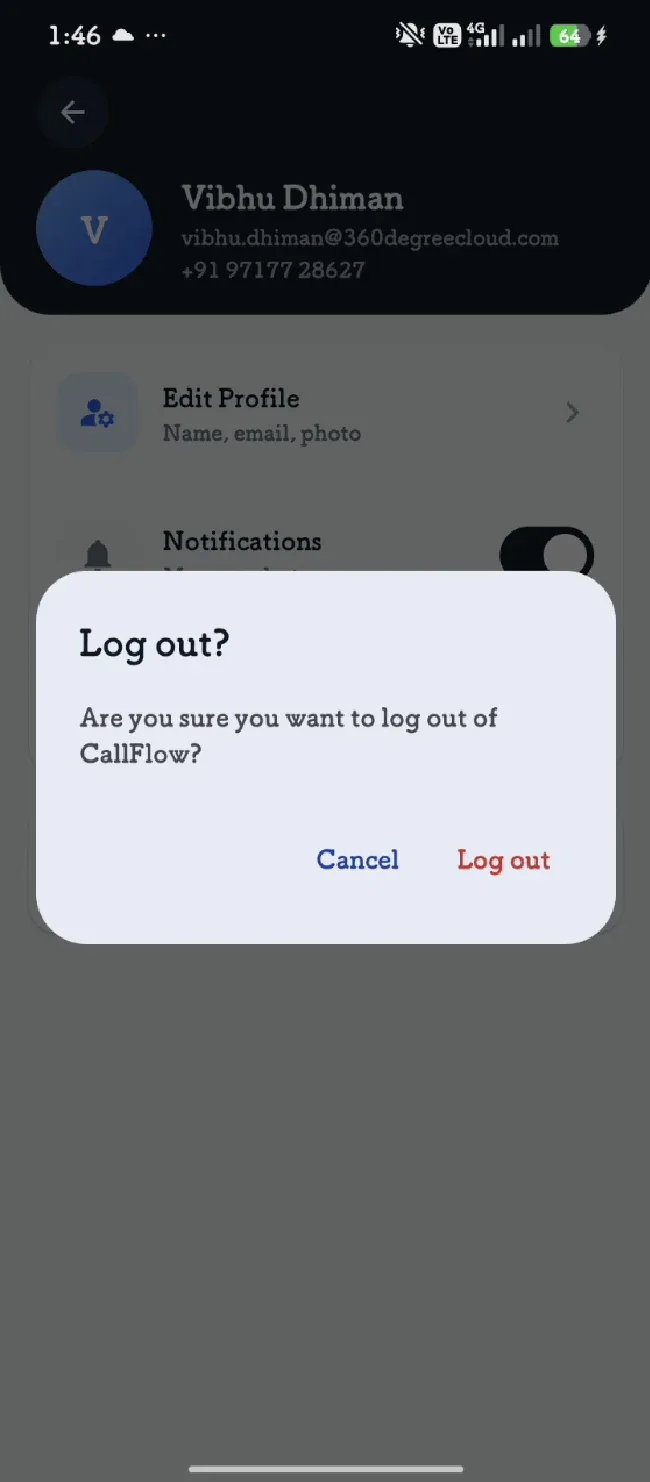
Tap your profile icon on the Home screen to open the account menu, where you can edit your profile, manage notifications, switch appearance mode, or log out.
5.8 Logging Out
To sign out of the app, open the account menu and tap “Log Out,” then confirm on the prompt that appears.
6. End-to-End Example: Recording and Syncing a Call
This section walks through the complete workflow from start to finish. Step 1: Connect Your CRM and Platform
- Go to Settings → CRM Set-up and connect your CRM (Section 4.1).
- Go to Settings → Platform Setup and connect your calling platform (Section 4.2).
Step 2: Make or Receive a Call
- Place or receive a call as you normally would, from the mobile app or your connected platform.
- Call Anchor automatically records the call and logs it as a new Call Record.
Step 3: Review and Sync the Call
- Open the call from the Call Records list (web or mobile) to review the recording and add notes.
- Call Anchor syncs the call — recording, notes, and metadata — to your CRM automatically.
- Confirm the sync succeeded from the Synced Records page.
Tip: Use this same workflow for every call you make once your CRM and platform are connected — no manual logging required.
7. Troubleshooting & FAQs
7.1 Common Issues
| Issue | Likely Cause | Resolution |
|---|---|---|
| Didn’t receive OTP code | Delivery delay or incorrect email/number entered | Use “Resend Code,” then verify the email or number on file is correct. |
| Calls not syncing to CRM | CRM connection expired or disconnected | Go to Settings → CRM Set-up and reconnect your CRM account. |
| Platform shows “Inactive” status | Authorization was not completed or has expired | Revisit Settings → Platform Setup and re-authorize the platform. |
| Trial expired banner appears | Free trial period has ended | Go to Settings → Licenses to upgrade to a paid plan. |
| Recording missing from a call | Call was made outside a connected platform | Confirm the call was placed through the Call Anchor app or a connected platform. |
7.2 Getting Further Help
If an issue isn’t covered above, open the in-app Tutorial for guided walkthroughs, or contact your Call Anchor administrator or support team for further assistance.